These sweet little Christmas cookies, made of buttery, tender shortbread, are truly easy to make. They're also easy to decorate with royal icing using the line and flood technique, no special skills required.

Why we love this recipe
As classic cookies go, there's not much better than buttery, tender, not-too-sweet shortbread. With just a very few common ingredients and the fortitude to quit mixing while you're ahead, it's easy to make these simple cookies great.
When it comes to holiday baking, I'm all about the ratios — and I don't mean ingredient ratios. I mean I'm looking for a very high ratio of cookie fabulousness to time, effort and skill level required. Once upon a time, this used to mean I would shy away from cookie recipes that require rolling pins and icing technique.
But then, while we were living in London, I accompanied our older kid to a friend's birthday party at Biscuiteers, where seven-year-olds made beautiful, genuinely delicious cookies using the line and flood technique.
Making exquisite decorations is very hard, and I definitely don't have the skills or the patience for it. But making pleasing decorations is 100% achievable and really fun, especially when you do it with family and friends.
I first published this recipe here back in 2015. I've since updated the post for clarity, but the recipe remains the same.
What you'll need
Here's a glance at the short list of ingredients you'll need to make this recipe.
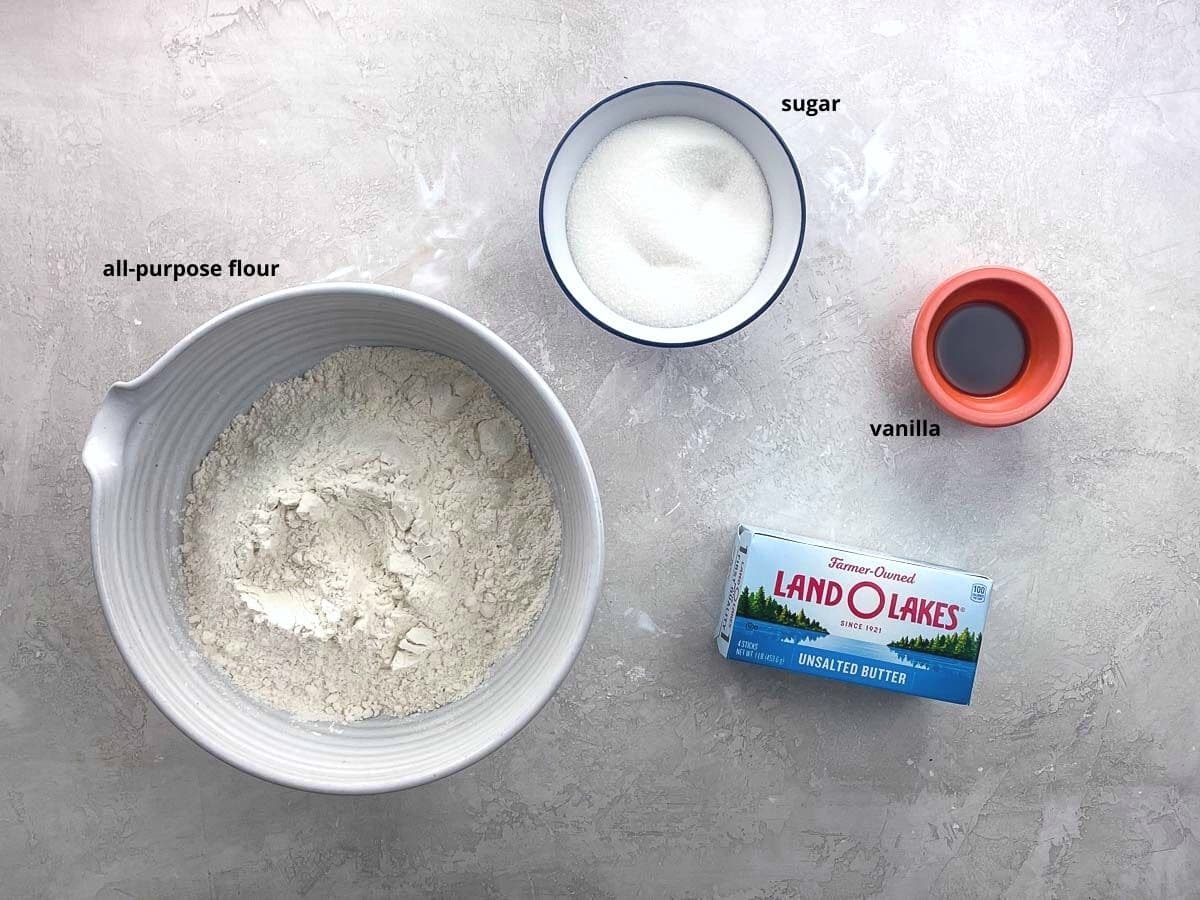
- Good old all-purpose flour, unsalted butter, and granulated sugar make the shortbread dough
- A splash of pure vanilla extract adds a cozy, amenable layer of flavor to the dough
- You'll also need a batch of royal icing
How to make them
Here's an overview of what you'll do to make a beautiful batch of these easy Christmas cookies. You can see the steps in action in the video that accompanies this post, and get all the details in the recipe card below.
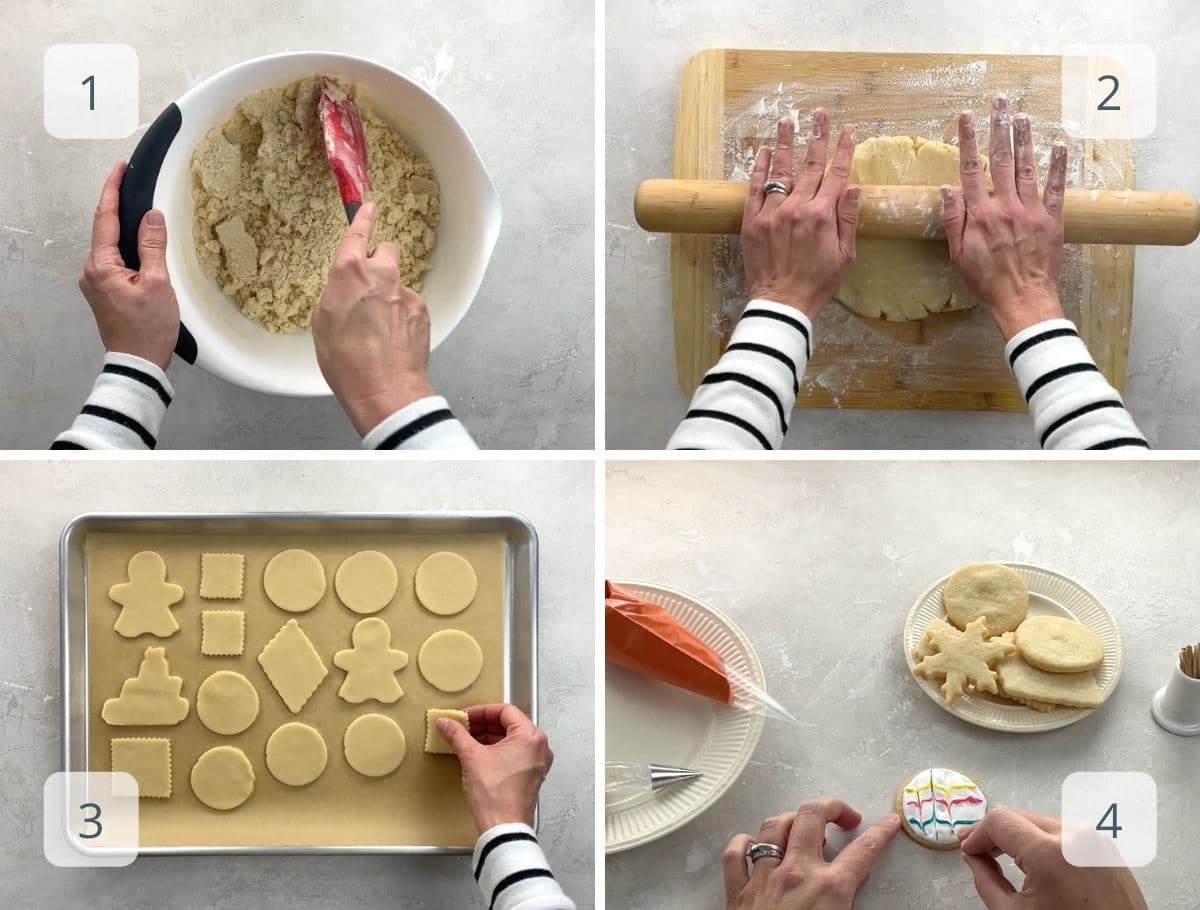
- Beat the butter and sugar together until creamy, and then beat in the vanilla. Add the flour and mix in with a wooden spoon or sturdy rubber spatula until just incorporated. I like to use my hands for the last bit of mixing.
- Roll out dough to ¼-inch thick. (Note: in the video, I made a double batch of dough, so I divided it in half before rolling. You don't need to do that for a single batch.
- Cut out shapes with festive cutters, place on a parchment-lined baking sheet, and bake for about 15 minutes, until cooked through.
- When completely cooled, cookies are ready to decorate with royal icing.
Cookie decorating with the line and flood method
Basic cookie decorating can be easy, I promise.
I'm pretty impatient and miz at this sort of thing, but I made those cookies up there for the very first time for our school's teacher cookie swap back in 2015, and I survived to photograph them. I even made them again the following week.
I know they don't look positively professional, but I like that they're pretty and yet obviously homemade. It's all about the attitude.
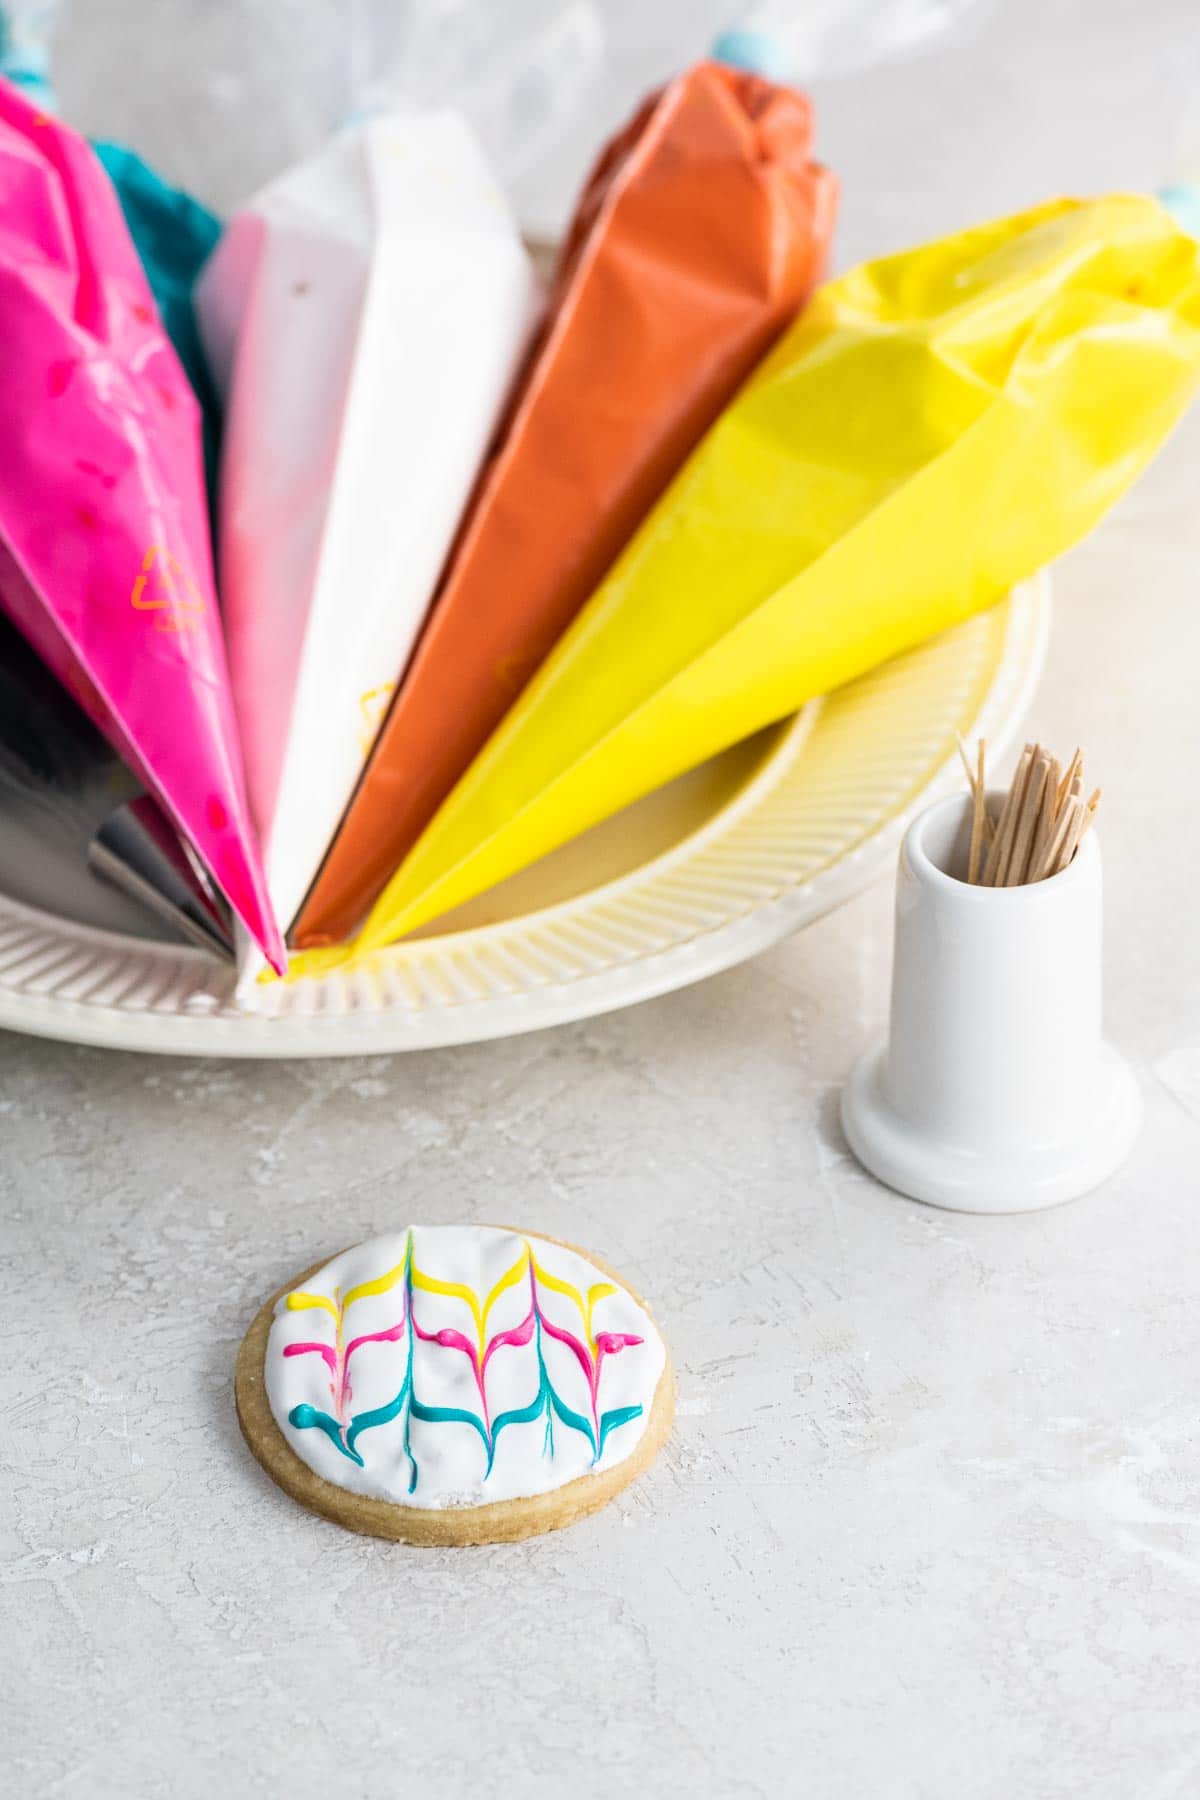
The line and flood method is exactly what it sounds like. Using one batch of royal icing, part of which you'll thin slightly more than the rest, you'll draw a line around the outside of each cookie and then flood the thinner icing inside the line to create a smooth surface.
In the cookies above, the ornaments (shut up, you knew they were ornaments) used line and flood. The snowflakes simply used the thicker royal icing. You'll find more detail in the post about Biscuiteers Royal Icing.
But first, I insist you watch this cookie video from Biscuiteers' Instagram feed. It's the Britishest thing ever, and it's very sweet. Not just because it's made of cookies.
Expert tips and FAQs
You don't! If you'd rather, you can roll the dough into a log of about 2 ½-inch diameter, wrap it well, and refrigerate to firm up (or even freeze it for later) Slice ¼-inch thick cookies from the log and bake as directed.
You can bake and decorate the cookies a day or two in advance and store in an airtight container at room temperature. Once dried, royal icing is very stable.
Store leftovers in an airtight container at room temperature for up to a week.
You can freeze the shortbread biscuits after baking and before decorating. Arrange cooled cookies on a parchment-lined baking sheet and place in the freezer until solid so they won’t stick together. Then transfer them to an airtight container with parchment between the layers of cookies. Freeze for up to 3 months. Defrost at room temperature before decorating.
More favorite easy Christmas cookies
Hungry for more?
Subscribe to Umami Girl's email updates, and follow along on Instagram.

Easy Christmas Cookies
Ingredients
- ½ pound (227 grams) unsalted butter, at room temperature
- ½ cup + 1 tablespoon ((112 grams) sugar)
- 1 teaspoon pure vanilla extract
- 2 ½ cups (300 grams) all-purpose flour (see note 1)
Instructions
- Preheat oven to 325°F with a rack in the center.
- Cut the butter into small pieces and place it in a large bowl (or the bowl of a stand mixer) with the sugar. Beat on medium speed until lightened in color and fluffy. Add the vanilla extract and beat to incorporate.
- Add the flour and stir in gently with a spatula or wooden spoon until incorporated. I like to mix the last little bit with my hands. Don't overmix, or the cookies will be less tender.
- Shape dough into a disk.
- Dust work surface and rolling pin with flour and gently roll dough into a ¼-inch thick circle(-ish). Cut into shapes using a cookie cutter. You can re-roll any scraps and use them to make a few more cookies.
- Transfer cookies to a cookie sheet lined with parchment and chill in the fridge for 15 minutes to help them retain their shape in the oven.
- Bake about 15 minutes, until very lightly golden. (Cookies this thick may not color much at all.)
- Remove from the oven and transfer cookies to a wire rack to cool completely before decorating.
Notes
- If you have a kitchen scale, please use it to weigh the flour for this recipe and all baking recipes. If not, please read my post and watch my video about measuring flour, and use the spoon and level method to measure.
- Here's the recipe and instructions for decorating with royal icing.
- You can bake and decorate cookies a day or two in advance and, once cooled completely, store in an airtight container at room temperature. Store leftovers in the same manner for up to a week.
- You can freeze the shortbread biscuits after baking and before decorating. Arrange cooled cookies on a parchment-lined baking sheet and place in the freezer until solid so they won’t stick together. Then transfer them to an airtight container with parchment between the layers of cookies. Freeze for up to 3 months. Defrost at room temperature before assembling.
Nutrition
Hungry for more?
Subscribe to Umami Girl's email updates, and follow along on Instagram.





crack says
Anonymous says
Anonymous says
Anonymous says
Anonymous says
Anonymous says
Anonymous says
Anonymous says