This post may contain affiliate links. Learn more.
These delicious, foolproof chocolate sugar cookies are satisfying on their own and also perfect for decorating. Here’s how to make them both ways.
Why we love this recipe
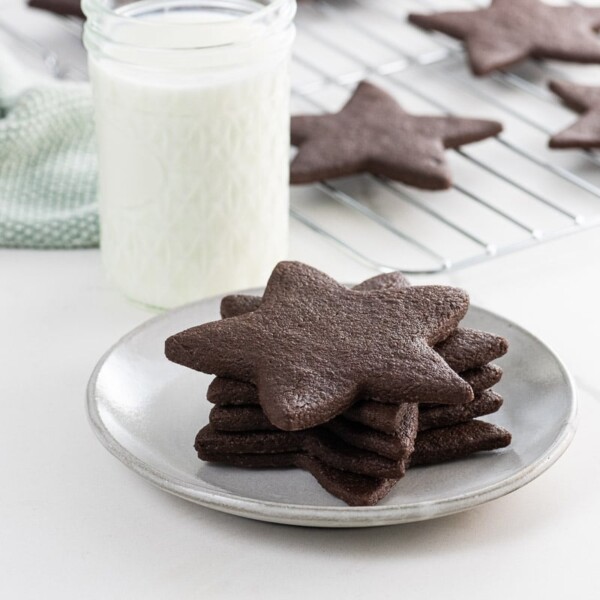
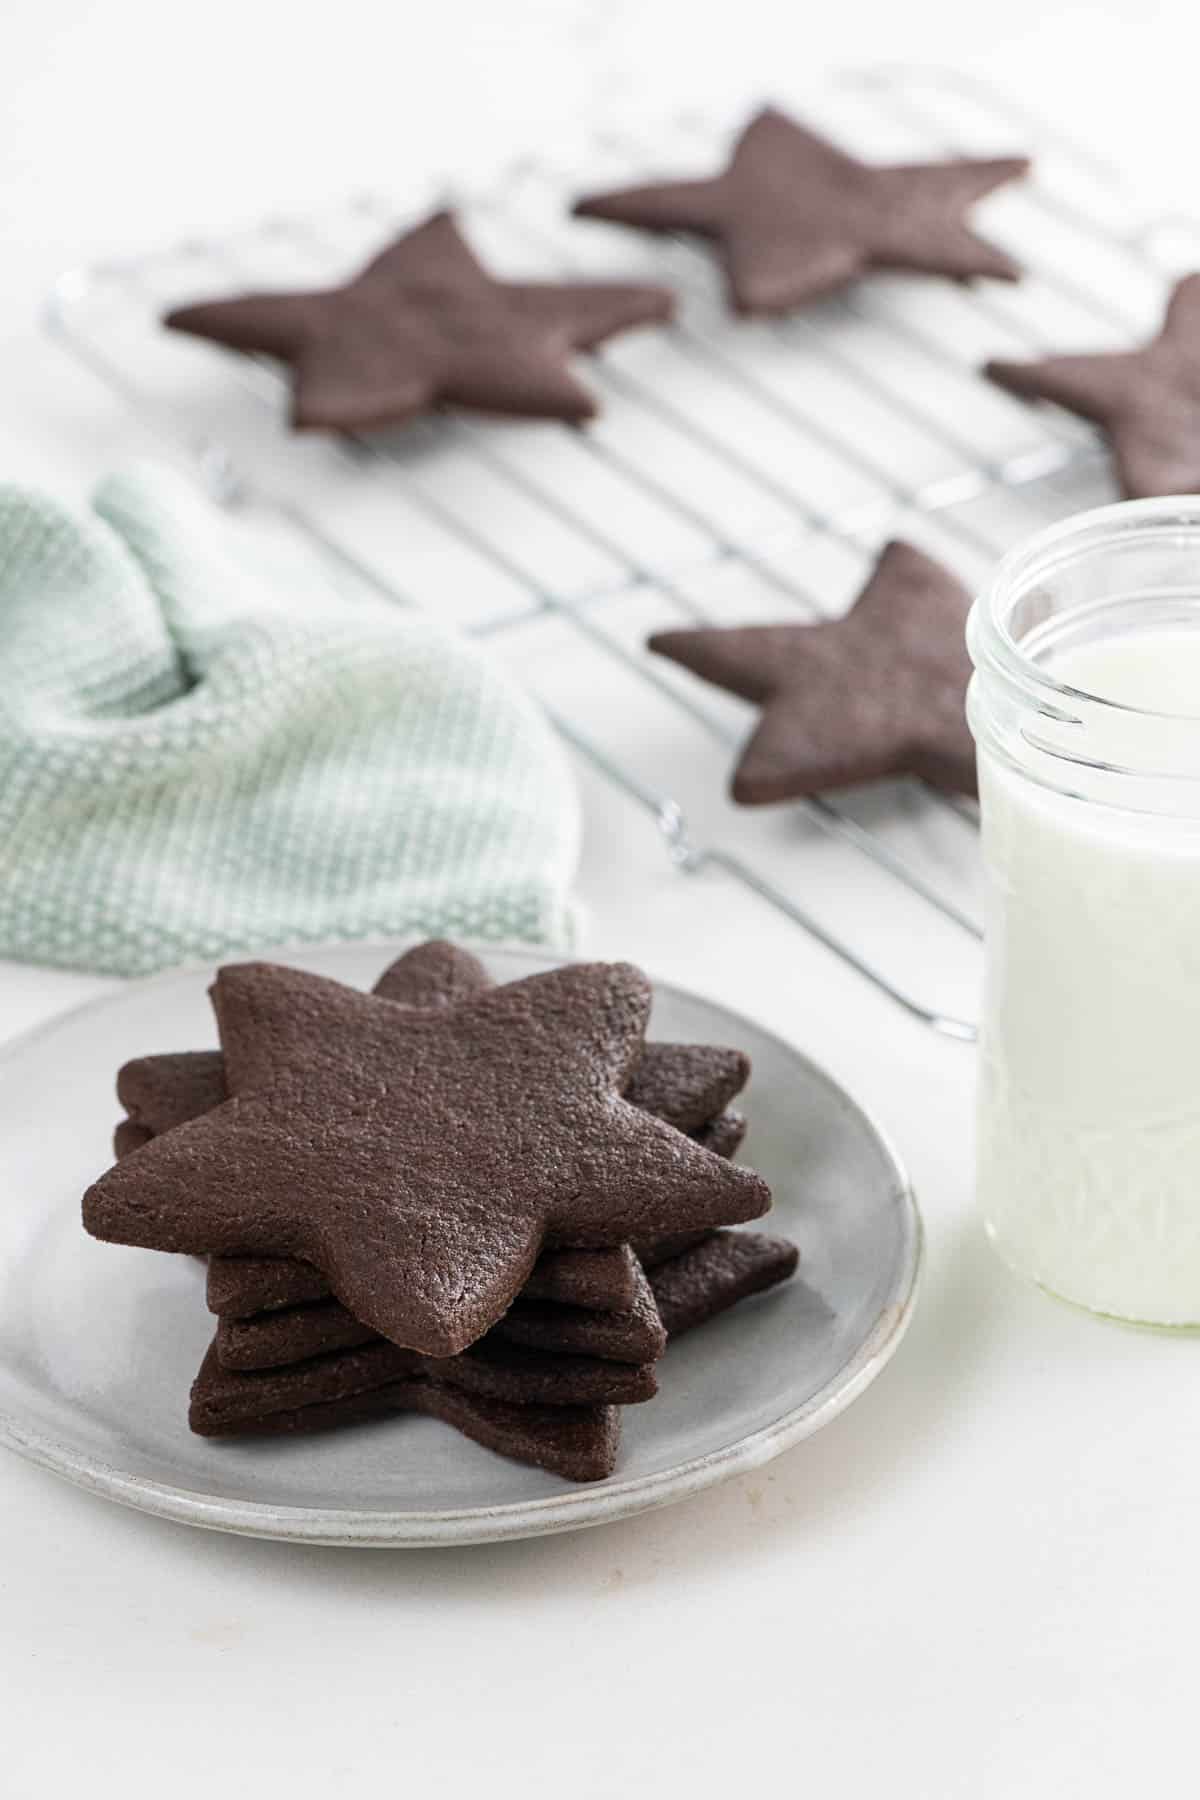
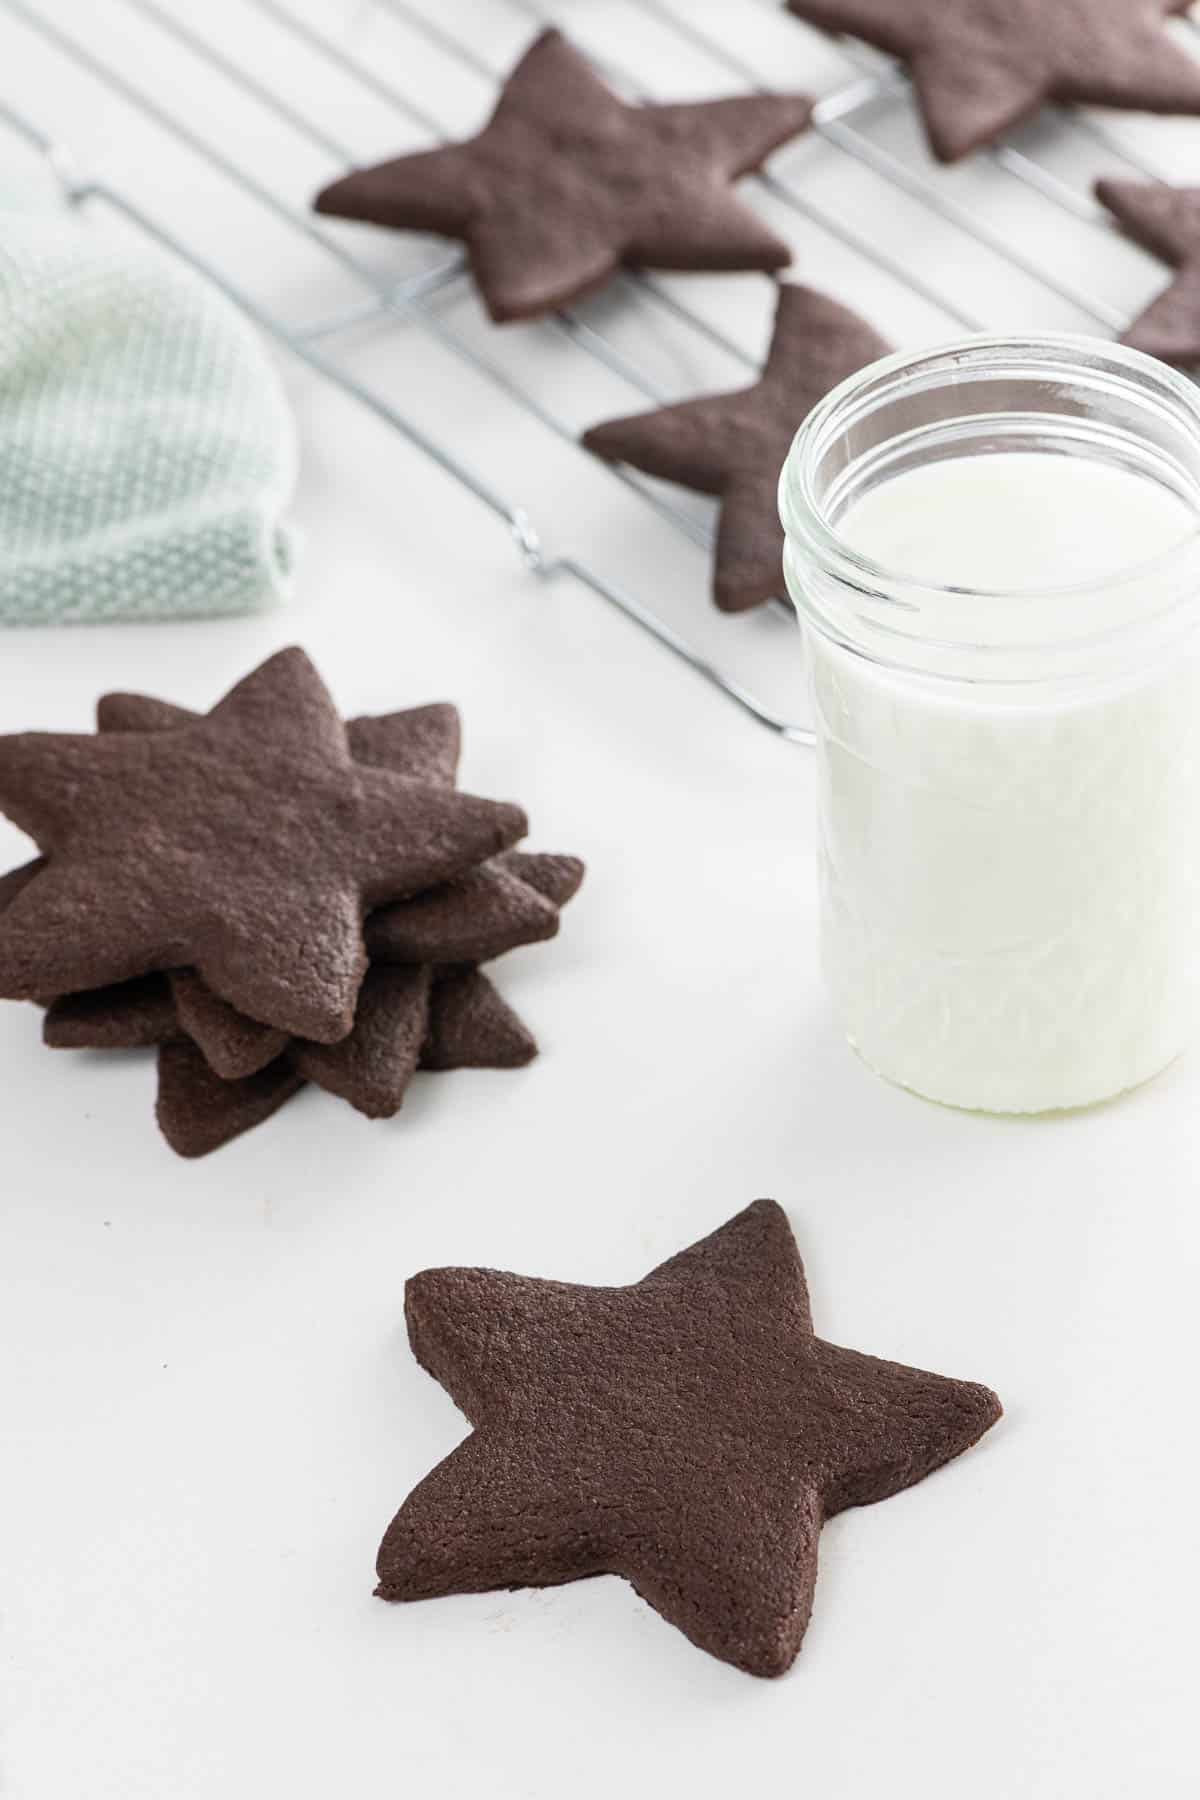
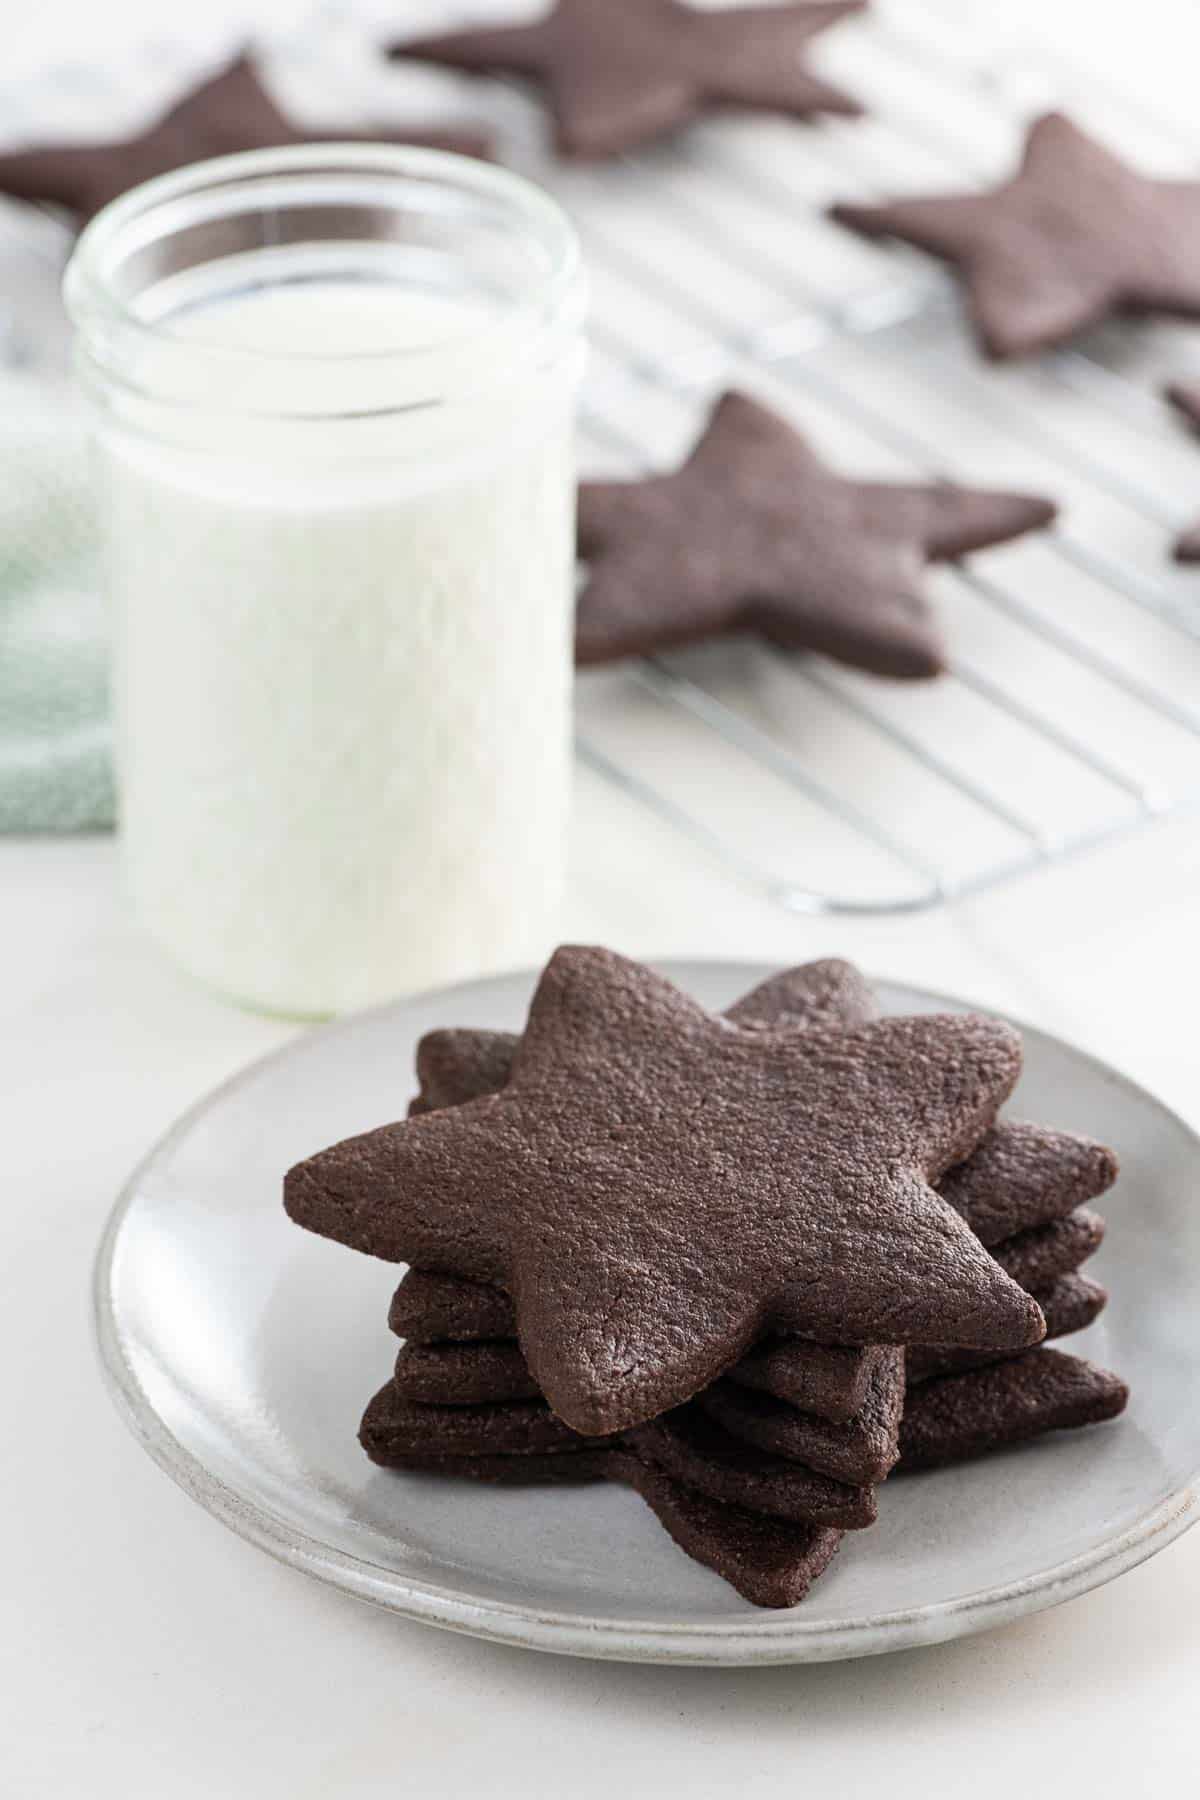
I’ll just say it — these chocolate sugar cookies are dreamy. The dough is super-chocolatey and easy to work with, and it makes lightly crisp, beautifully tender cookies. They’re lovely and satisfying as-is, stamped into any shape you like. But they also make wonderful sandwich cookies and hold up brilliantly to decorating with royal icing for any theme or occasion.
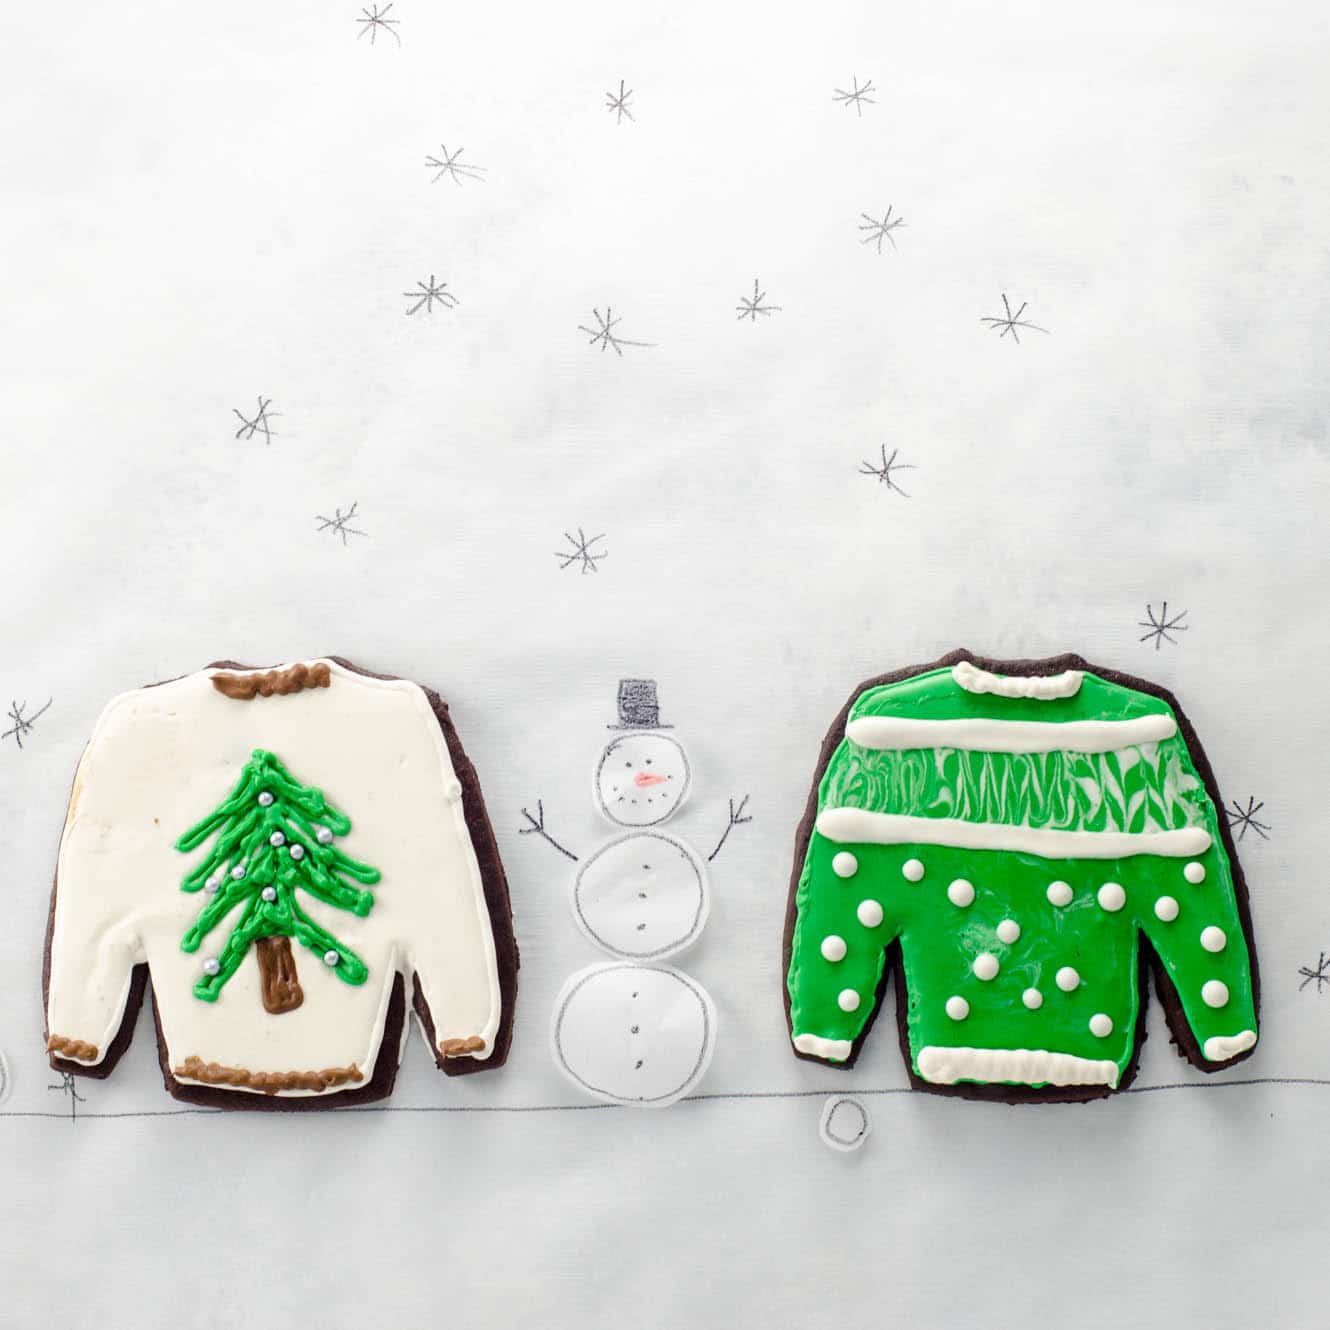
I first published this post here back in 2017, with a stop-animation video featuring Betty and Pearl, cookies shaped and decorated like ugly sweaters. You can learn more about how to make that variation in the section below. I’ve since updated the post for clarity — the cookie recipe remains the same.
What you’ll need
Here’s a glance at the ingredients you’ll need to make this recipe.
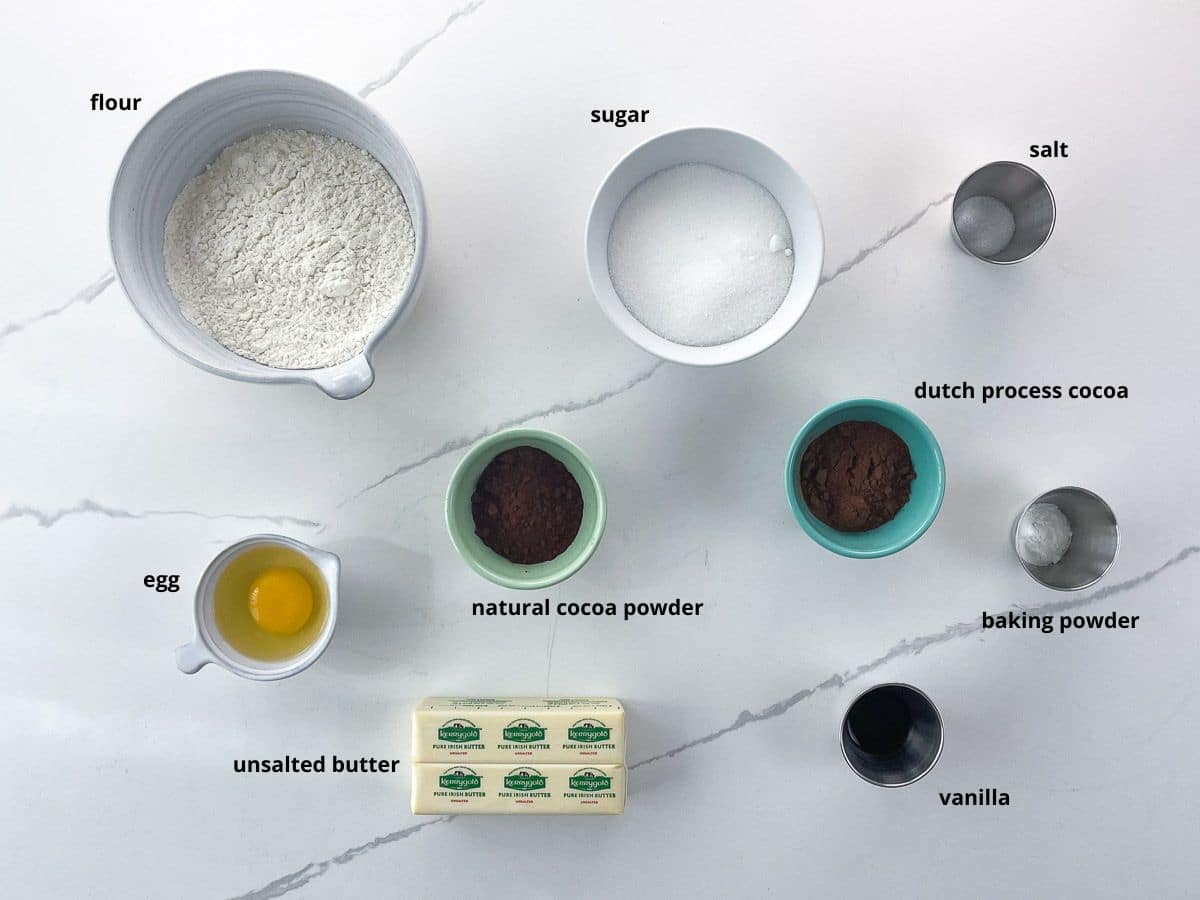
- You’ll use two kinds of cocoa powder to make these cookies, both unsweetened. Natural cocoa powder has its acidity intact. The better-quality your cocoa, the more pure and chocolatey your cookies will taste. Dutch process cocoa has been treated with alkali to neutralize its acidity. Don’t substitute one for the other, since they behave differently in baking.
- Good-old all-purpose flour and granulated sugar create lightly crisp, beautifully tender cookies with minimal fuss.
- Use a really good-quality butter if you can. Here and virtually everywhere, I start with a cultured butter from grass-fed cows. This sounds fancy but doesn’t have to be. Kerrygold, for example, is sold in most supermarkets at a reasonable price. I’ve called for unsalted butter and some salt in this recipe, but you can use salted butter and omit the extra salt if that’s what you’ve got on hand.
- A little bit of pure vanilla extract enhances the chocolate flavor.
How to make it
Here’s an overview of what you’ll do to make a great batch of chocolate sugar cookies. You can see the cake-baking steps in action in the video that accompanies this post, and get all the details in the recipe card below.
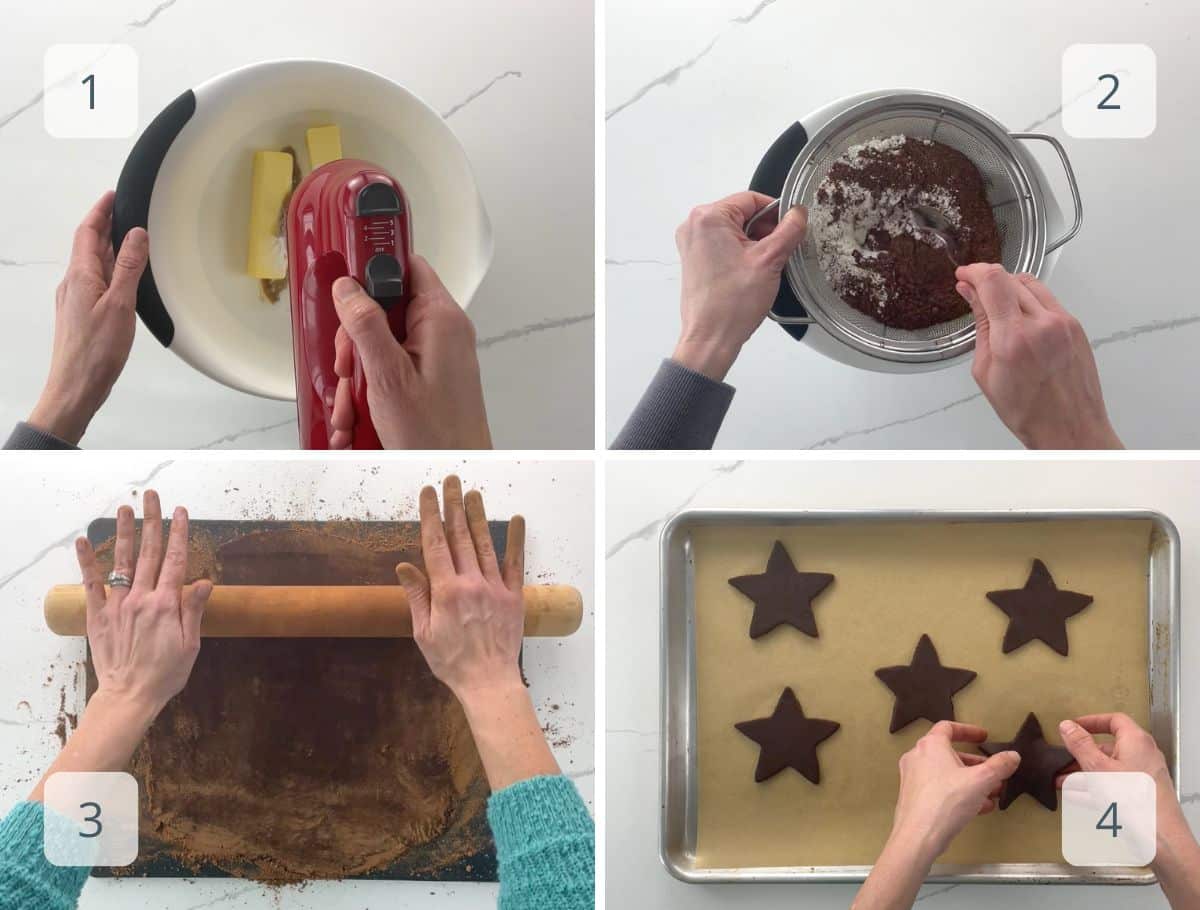
- First you’ll beat together the butter, sugar, baking powder, vanilla, and salt until creamy. Then beat in the egg.
- Sift together the flour and the cocoa powders, then beat them into the butter mixture until just incorporated.
- Chill the dough, then roll it out and stamp out shapes with cookie cutters.
- Bake, cool, and serve (or decorate if you like). That’s it!
Expert tips and FAQs
You can. Once completely cooled, these cookies will keep well in an airtight container at room temperature for a week. Or make use of the freezer. You can freeze well-wrapped dough or baked cookies for a couple of months. Defrost dough in the fridge overnight before using, or thaw cookies at room temperature.
Ugly sweater cookies
May I introduce Betty and Pearl, two ugly sweater cookies made using the recipe featured below and the line and flood icing technique. Betty got her name from my favorite British women’s athletic wear company Sweaty Betty. Because she’s a sweater, see? And Pearl comes from knit one purl two, although I can do neither.
A short stop-animation video: “When Cookies Step Out”
Here are Betty and Pearl playing in the snow.
What you’ll need to make them
If you’d like to make this version of chocolate sugar cookies, you’ll need an ugly sweater cookie cutter and stamp (or a steady hand), a batch of royal icing, and — as I think you can see — very little skill. You can learn more about the line and flood icing technique in the icing recipe post, or follow these basic instructions..
More favorite easy cookie recipes
Summarize & Save This Content On

Chocolate Sugar Cookies
Ingredients
- 16 tablespoons (224 grams) unsalted butter, at room temperature
- ¾ cup (150 grams) sugar
- 1 teaspoon baking powder
- 1 teaspoon (5 ml) vanilla extract
- ½ teaspoon fine sea salt
- 1 large egg
- 2 ¼ cups (270 grams) all-purpose flour
- ¼ cup (21 grams) very good quality natural cocoa powder, such as Vahlrona
- ¼ cup (21 grams) Dutch-process cocoa powder
Instructions
- In a large bowl or the bowl of a stand mixer fitted with the paddle, beat together the butter, sugar, baking powder, vanilla and salt until lightened and fluffy, about 5 minutes, scraping down bowl as necessary.
- Beat in egg until well combined.
- Into a medium bowl, sift together the flour and cocoa powders.
- Beat into wet ingredients all at once, just until well combined.
- Refrigerate dough for 30 minutes. (Dough will keep in fridge for 24 hours if you want to prepare it the day before.)
- Preheat oven to 375°F with two racks close to the center. Line two baking sheets with parchment.
- Divide dough into two discs. Sprinkle with cocoa.
- Roll out each disc until dough is 1/8" thick and cut into shapes with cookie cutters.
- Transfer cookies to baking sheets, leaving space between cookies.
- Bake cookies for 8 to 10 minutes, until edges begin to firm.
- Cool on pan for a couple of minutes and then completely on a rack before serving or decorating.
Notes
- Use a really good-quality butter if you can. Here and virtually everywhere, I start with a cultured butter from grass-fed cows. This sounds fancy but doesn't have to be. Kerrygold, for example, is sold in most supermarkets at a reasonable price. I've called for unsalted butter and some salt in this recipe, but you can use salted butter and omit the extra salt if that's what you've got on hand.
- You'll use two kinds of cocoa powder to make these cookies, both unsweetened. Natural cocoa powder has its acidity intact. The better-quality your cocoa, the more pure and chocolatey your cookies will taste. Dutch process cocoa has been treated with alkali to neutralize its acidity. Don't substitute one for the other, since they behave differently in baking.
- Once completely cooled, these cookies will keep well in an airtight container at room temperature for a week. Or make use of the freezer. You can freeze well-wrapped dough or baked cookies for a couple of months. Defrost dough in the fridge overnight before using, or thaw cookies at room temperature.
Nutrition
Nutrition information is automatically calculated, so should only be used as an approximation.