This post may contain affiliate links. Learn more.
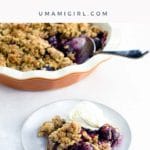
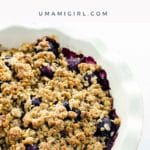


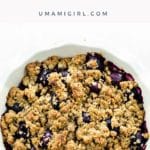
Cherry crisp is an easy and fabulous dessert. Our recipe coaxes out the natural sweetness of ripe cherries with a hint of vanilla and tops it off with a classic crust. Bake it in a pie plate for sharing or in adorable individual jars.
Why we love this recipe
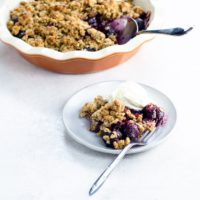
There’s nothing better than a big, bubbly pie plate of cherry crisp to share with friends. Except maybe a recipe that you can also pop into individual jars, stash in the freezer, and bake one by one.
This recipe:
- Makes the most of seasonal produce, enhancing cherries’ natural goodness without overwhelming it
- Is one of the easiest desserts around
- Can be made with frozen cherries if you’re craving a little summertime in the wintertime
- Sports a craveable crumble topping
Ingredients
Here’s what you’ll need to make our cherry crisp recipe. First you’ll make the filling.
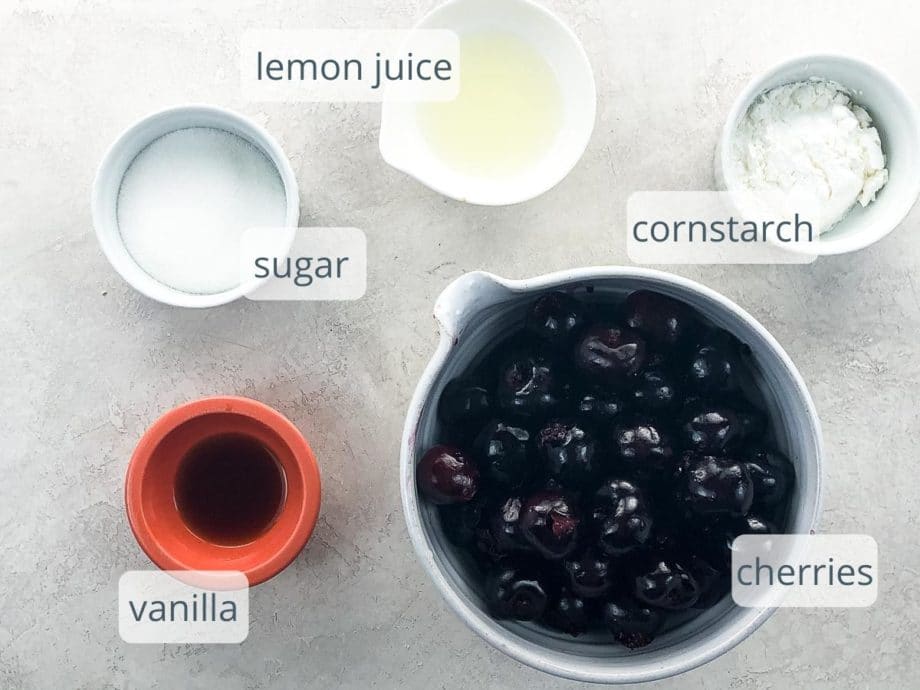
- Cherries: You can use any variety of sweet cherries for this recipe. (Here’s a sweet story about the sweetest cherries in the world.) // In general I’m not a fan of single-purpose kitchen tools, but a cherry pitter is an exception. It makes things SO much easier (and you can use it for olives, too).
- A little bit of vanilla amplifies the cherry flavor, and a splash of lemon juice adds a lovely brightness.
Then you’ll make the topping. This is our versatile crumble topping that we use for many a fruit crisp.
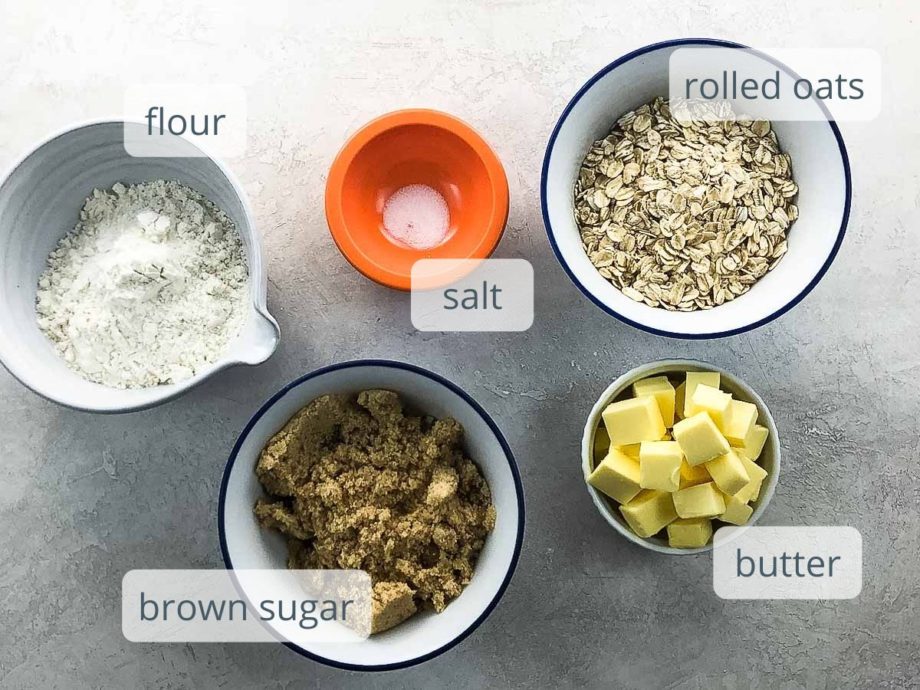
- I use old-fashioned rolled oats, but you can use quick oats too.
- A good-quality cultured butter goes a long way, here and in general.
- For the brown sugar, you can use regular, muscovado (which has a slightly smoky, earthy, molasses flavor), or a combination.
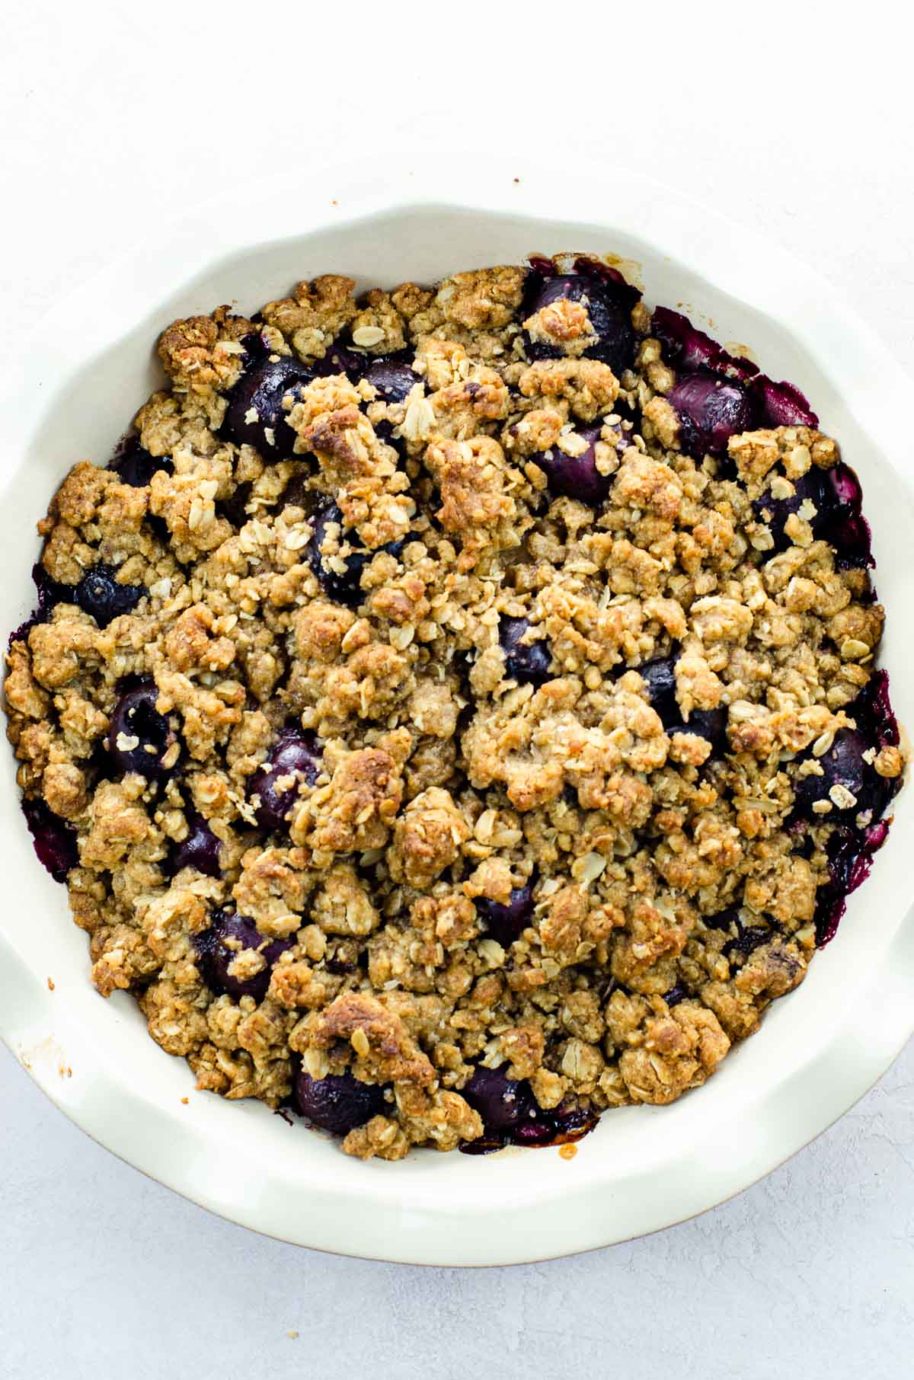
How to make cherry crisp
Making a cherry crisp is truly easy, which is one of the reasons I love to do it. Individual fruit crisps take about two additional minutes but no extra skills. You can see all the steps in action in the video that accompanies this post.
The filling
First, you’ll mix together the filling ingredients.
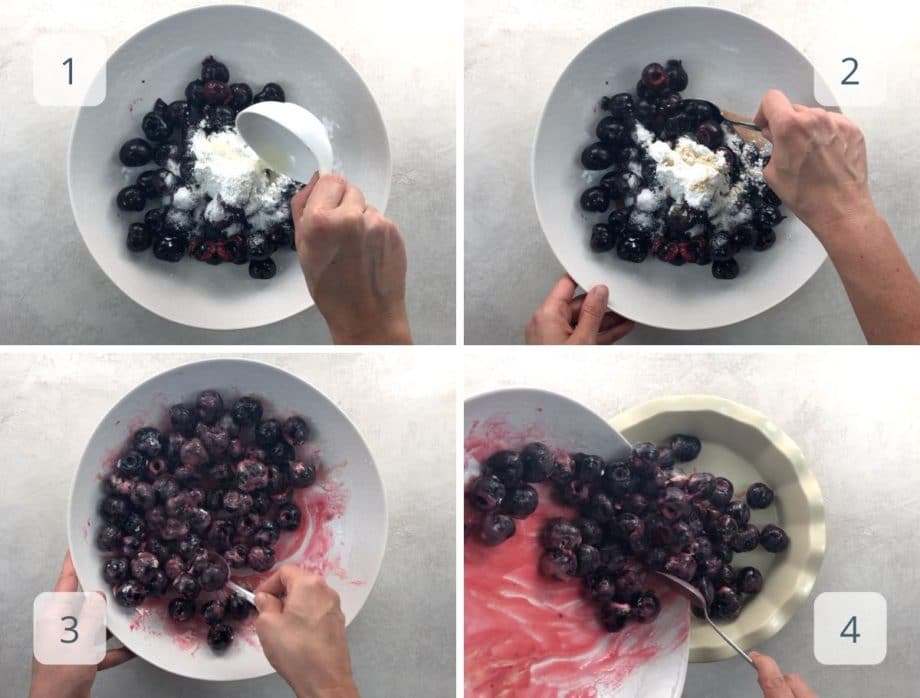
- Whether you’re making a big cherry crisp or individual fruit crisps, add the cherries, sugar, cornstarch, lemon juice and vanilla to a large mixing bowl.
- As you stir it up, the cherry juice, liquid ingredients, and cornstarch will start to combine into a velvety filling.
- Keep mixing until it all looks homogenous.
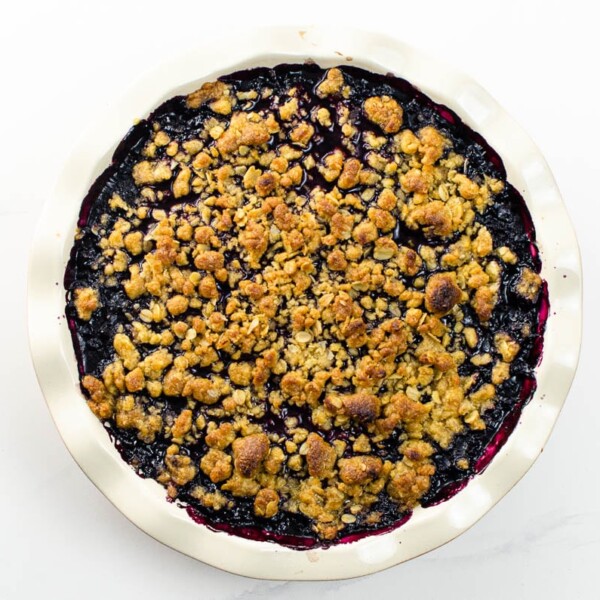
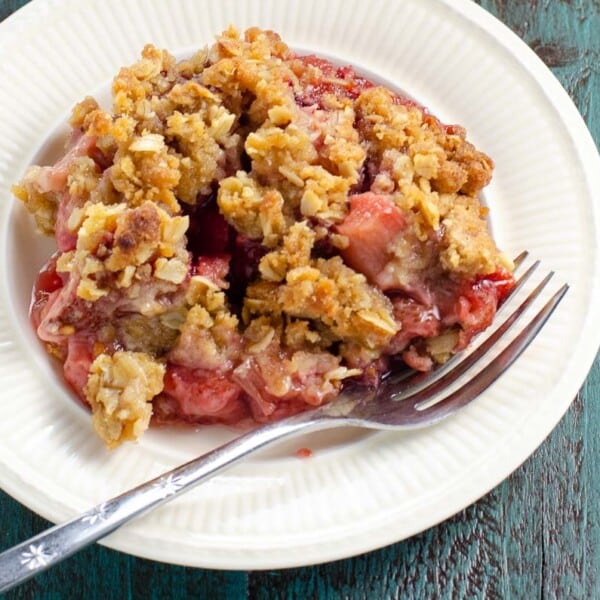
- Pour the filling into a deep-dish pie plate, or divide it equally into eight individual 4-ounce canning jars.
The topping
Crumble topping is such a great, easy formula to stash in your back pocket. This is the secret to making an abundance of seasonal fruit into something even more special.
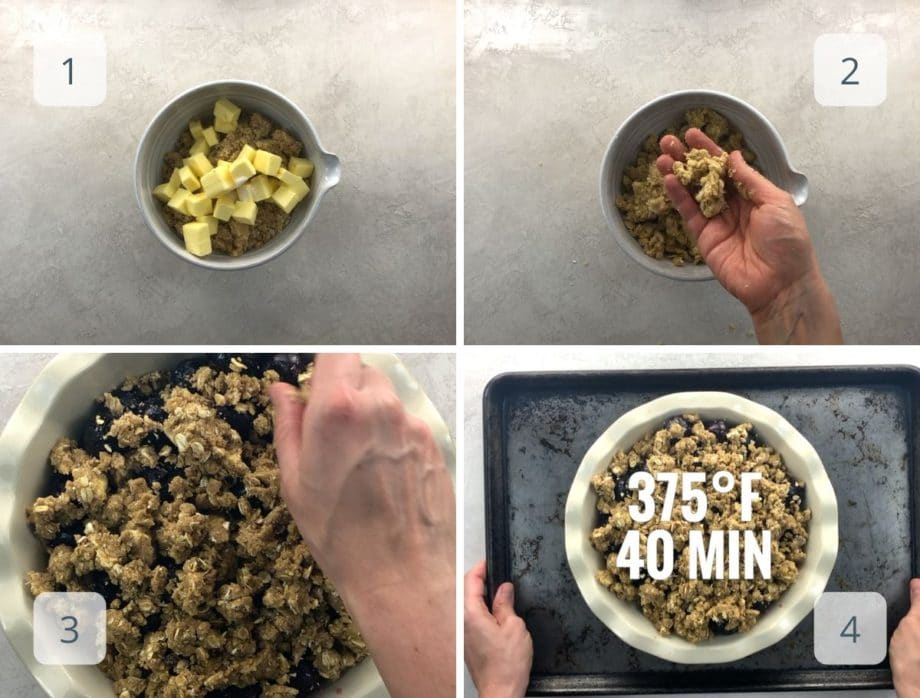
- Add all the topping ingredients to a medium bowl.
- Pinch them together with your fingertips until there’s no loose flour or butter.
- Sprinkle it evenly over the cherries. If you’re making individual fruit crisps, divide it up among the jars so each bite will be a perfect combo of filling and crunchy topping.
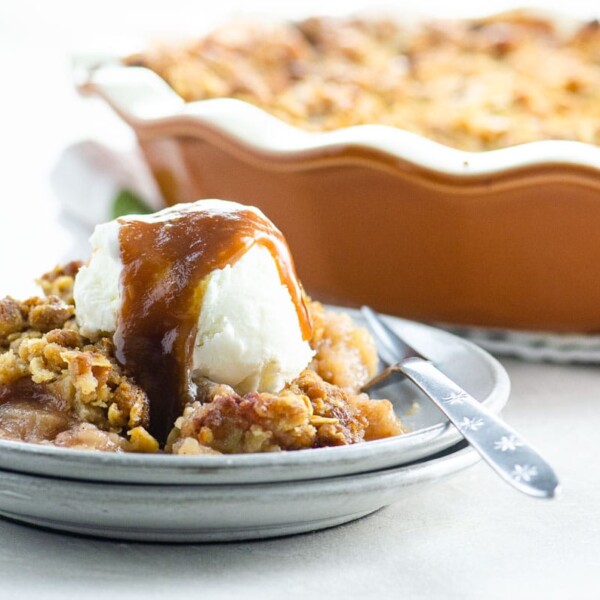
- If you’re freezing the jars, pop the lids on and stash them in the freezer now. To bake, place the pie plate or the jars on a rimmed baking sheet to catch any drips. Cover it loosely with foil and bake for 60 minutes (40 minutes for jars), then remove the foil and continue baking until the filling bubbles in the very center and the topping is lightly browned, about 30 minutes more (15 minutes for jars). That’s it!
Expert tips and FAQs
Absolutely. This is a great place to use frozen fruit, especially out of season. Defrost it first and drain the juices. You can discard them or transfer a small pot. Simmer juice until it’s reduced to just 3 to 4 tablespoons. Proceed as directed, pouring the reduced juice into the bowl to mix with the fruit after stirring in the cornstarch, sugar, and lemon juice.
Depending on your oven, you’ll probably find that the topping is perfectly browned by about halfway through baking. Drape a piece of foil over the pie plate at this point to prevent further browning. You don’t even need to tuck it in.
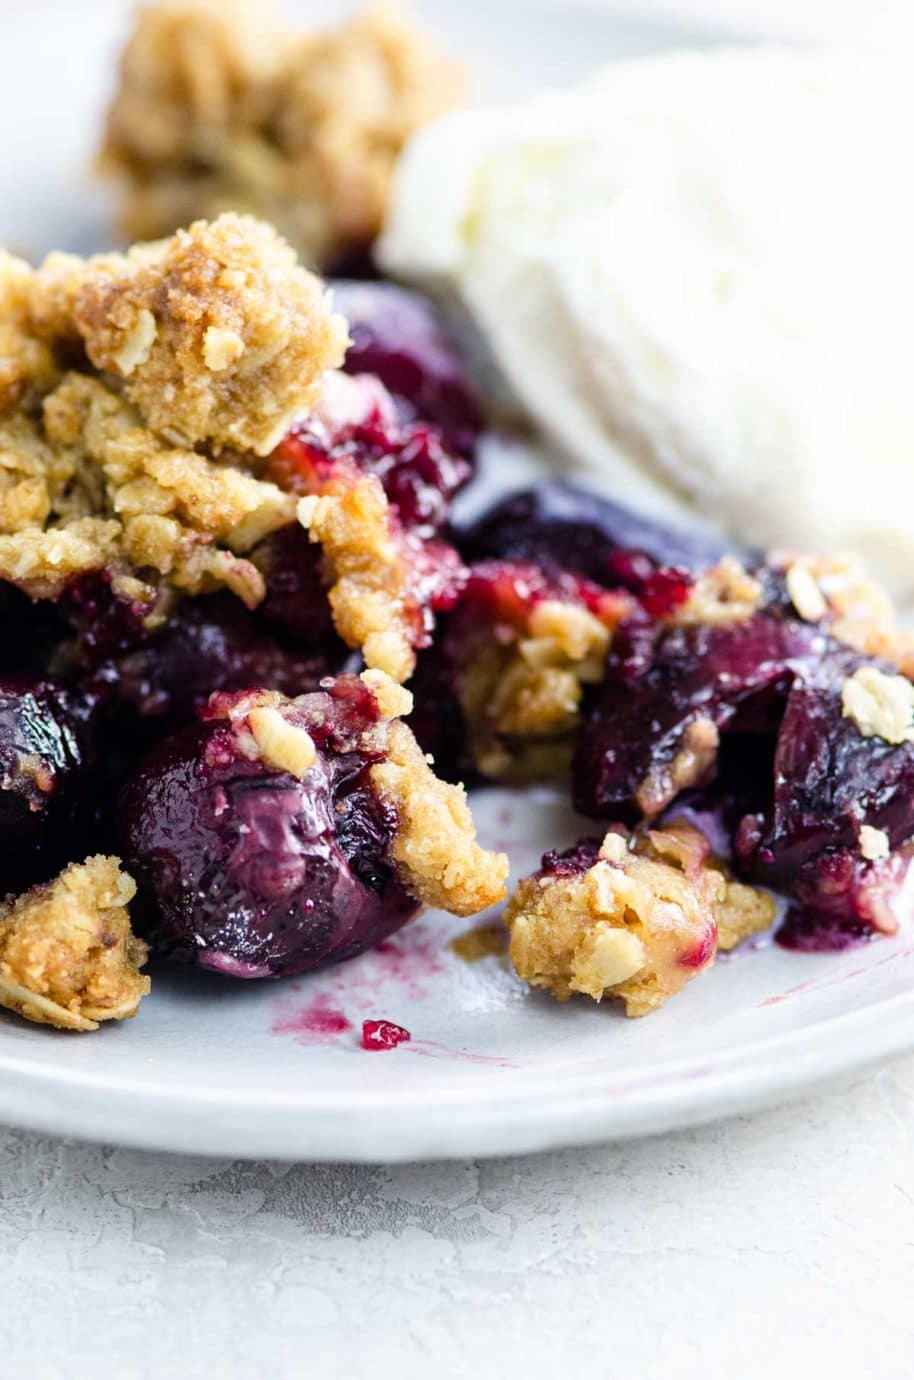
This recipe is very flexible! Serve with alone or topped with vanilla ice cream for dessert, or with Greek yogurt as an excuse to eat dessert for breakfast or brunch. It’s equally great warm or at room temperature.
We don’t find that this recipe hangs around for very long! If you do have leftovers, you can cover the pie plate and leave it at room temperature for 24 hours. After that, store it in the fridge for up to a week. If you want to recrisp the topping before serving, pop it into the toaster oven for a few minutes.
More of our favorite crisp recipes
And if you love baking with cherries, don’t miss our classic cherry clafoutis.
Hungry for more?
Subscribe to Umami Girl’s email updates, and follow along on Instagram.
Cherry Crisp
Ingredients
For the filling
- 1 ½ pounds (680 grams) cherries, stemmed and pitted
- ¼ cup (50 grams) sugar
- ¼ cup (28 grams) cornstarch
- 2 teaspoons (10 ml) vanilla extract
- 1 tablespoon (15 ml) freshly squeezed lemon juice
For the topping
- ¾ cup (60 grams) rolled oats
- ¾ cup (90 grams) all-purpose flour
- ⅔ cup (142 grams) light muscovado sugar or light brown sugar
- Pinch of salt
- 8 tablespoons (112 grams) butter, diced
Instructions
- Preheat the oven to 375°F with a rack in the center.
- In a large bowl, toss together the cherries, sugar, cornstarch, vanilla extract, and lemon juice until well combined.
- Set either a deep-dish pie plate or eight 4-ounce canning jars on a heavy, rimmed baking sheet and spoon in the filling, dividing equally if using jars.
- In a medium bowl, combine the oats, flour, brown sugar, and salt. Stir together thoroughly. Add the diced butter and, using your fingers, pinch the ingredients together until they form a cohesive, crumbly topping and no lumps of butter or loose bits of flour or sugar are left.
- Crumble the topping evenly over the filling, again dividing equally if using jars.
- Place the pie plate or jars on a rimmed baking sheet to catch any drips. Cover with foil and bake for 60 minutes (40 minutes for jars), then uncover and continue baking until the topping is browned and the filling is bubbly all the way to the very center, 30+ minutes more (15 minutes for jars).
- Serve alone or topped with vanilla ice cream.
Step-by-step video
Notes
- These are the 4-ounce canning jars I use.
- To make this recipe gluten-free, use certified gluten-free oats and a gluten-free flour blend such as this one.
- If making individual jars, you can bake them right away. Or you can prepare a batch, screw the lids on tight, and freeze them for up to six months before baking. Give them as gifts — to others, or one at a time, after a too-long day, to yourself. You can bake them straight from frozen but may need to add a few minutes to the baking time.
- Protip: Fruit crisps make an acceptable breakfast once in a while. 🙂 Serve with alone or topped with vanilla ice cream for dessert, or with Greek yogurt as an excuse to eat dessert for breakfast or brunch.
- Cherry crisp is equally great warm or at room temperature.
- Storing and reheating leftovers: Cover and leave at room temperature for 24 hours. After that, store it in the fridge for up to a week. If you want to recrisp the topping before serving, pop it into the toaster oven for a few minutes.
- You can start with frozen cherries if you like. Defrost them first and drain the juices. Either discard or transfer to a small pot. Simmer juice until it's reduced to just 3 to 4 tablespoons. Proceed as directed, pouring the reduced juice into the bowl to mix with the fruit after stirring in the cornstarch, sugar, and lemon juice.
Nutrition
Nutrition information is automatically calculated, so should only be used as an approximation.
Hungry for more?
Subscribe to Umami Girl’s email updates, and follow along on Instagram.


You should try Hot Cherries Jubilee over french Vanilla Ice cream. It
has a 7 min prep time if cherries are already pitted. There are many good recipes on web. Use only fresh lemons, there’s no comparison with concentrate.
Might guidelines for proper Porridge, and Bangers and Mash be in the future for those of us who remain on this side of the pond?
This is going to be a trip for all of us!
Here’s my secret for cherry clafoutis (don’t tell anyone): jarred Morello cherries. Or even frozen ones from Trader Joe’s. I tend to make them more in the cooler months, and leave the height-of-the-season stuff for straight-on eating (gorging).
I love clafoutis but I’ve never made a cherry one. Give it a try, it will be so worth it, I’m sure 😀 These crisps look fantastic though! I love that you made them in jars to be frozen, that is an awesome idea. I’m going to try that out some time 😀
My very, very favorite part of this whole thing, aside from the obvious (that you mention me! me! me!), is that somehow you think *I* am a cherry clafouti maker, too. And yet, I would make 5,000 of these wee little crisps before I’d go all custardy on those cherries. And you used muscovado!
I have just used 4 exclamation points in this single comment, which should tell you something.
But, but…baking a clafoutis is really, really easy. I could make a clafoutis when I was a first-time mother (and virtual newlywed) and could make about ten things. And: I’ve never tried it, but I have read that it tastes better if you leave the pits _in_!