This post may contain affiliate links. Learn more.
I never thought I’d be able to decorate cookies like this until I watched a bunch of seven year olds do it at a birthday party in London back in 2012. The Biscuiteers royal icing recipe is adapted from the Notting Hill bakery of the same name. Here’s how to make it and use it.

Why we love this recipe
Biscuiteers royal icing uses meringue powder instead of fresh egg whites to produce a glossy, easy-to-use icing from ingredients that are easy to keep on hand. You can use this flexible recipe to create a variety of icing consistencies, ideal for everything from gingerbread house construction to line and flood cookie decoration.
This recipe:
- Is easy enough for kids to have fun using, and sophisticated enough for professional-level decorating if you are (I’m definitely not)
- Is highly amenable to coloring and flavoring
- Keeps well at room temperature for two weeks, so you can decorate cookies in a leisurely fashion throughout the holiday season if you like
I first published this recipe here back in 2015. I’ve since updated the post for clarity and slightly increased the water content in the base recipe.
What you’ll need
Here’s a glance at the ingredients you’ll need to make this recipe.
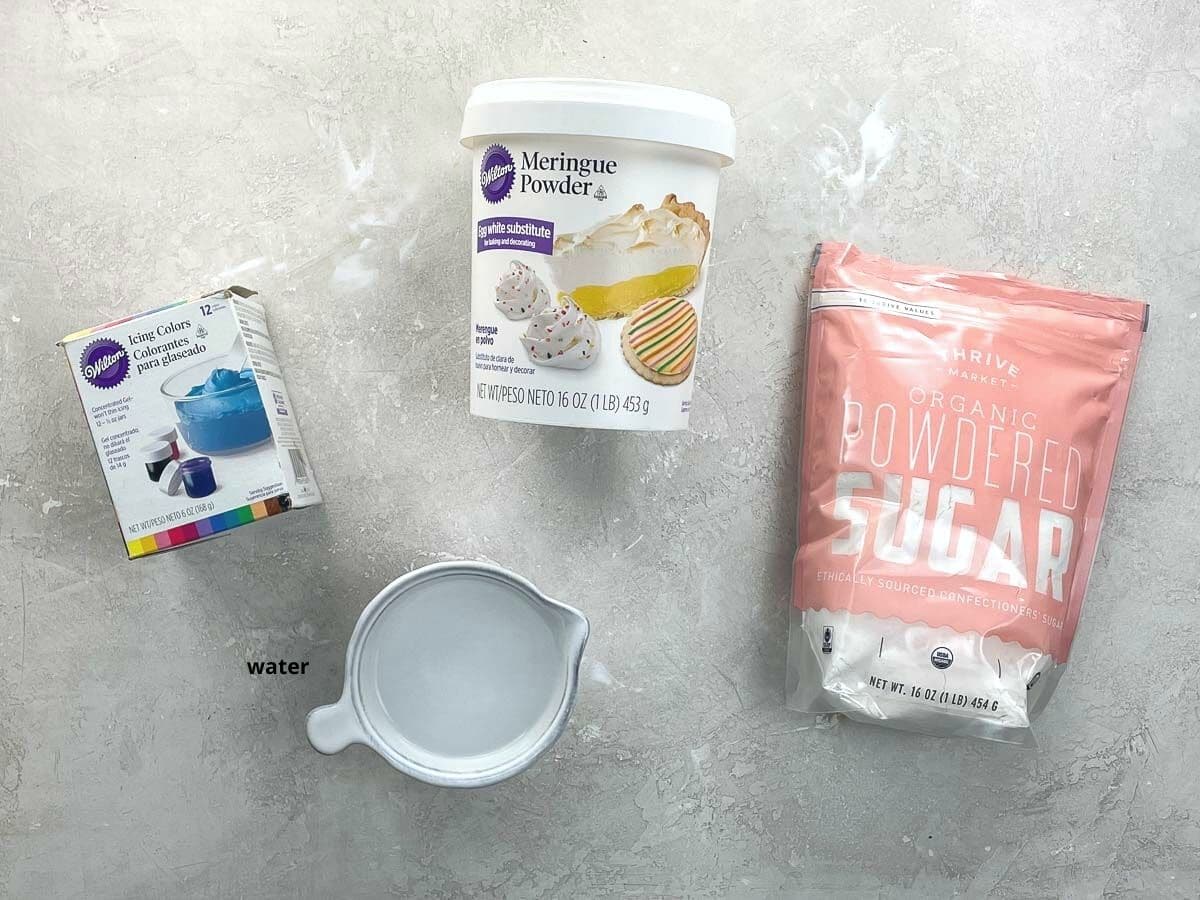
- Royal icing is sometimes made with egg whites, but I find it’s just as easy — and much easier to keep ingredients on hand — with meringue powder. It’s available in the baking aisle of craft stores or online.
- The bulk of this icing comes from powdered sugar, also called confectioners’ sugar or 10x sugar. Organic powdered sugar produces the smoothest, best-tasting result that isn’t grainy. You can sift it if you like, but I don’t really find it necessary.
- Gel food coloring produces brightly colored icing without adding too much liquid.
- The amount of water you’ll add depends on your decorating needs and your environment.
- Optional and not pictured: If you like, you can flavor your icing with a few drops of a pure extract. See the section below for more information.
How to make it
Here’s an overview of what you’ll do to make a batch of Biscuiteers royal icing. You can see all the steps in action in the video that accompanies this post, and get the details in the recipe card below.
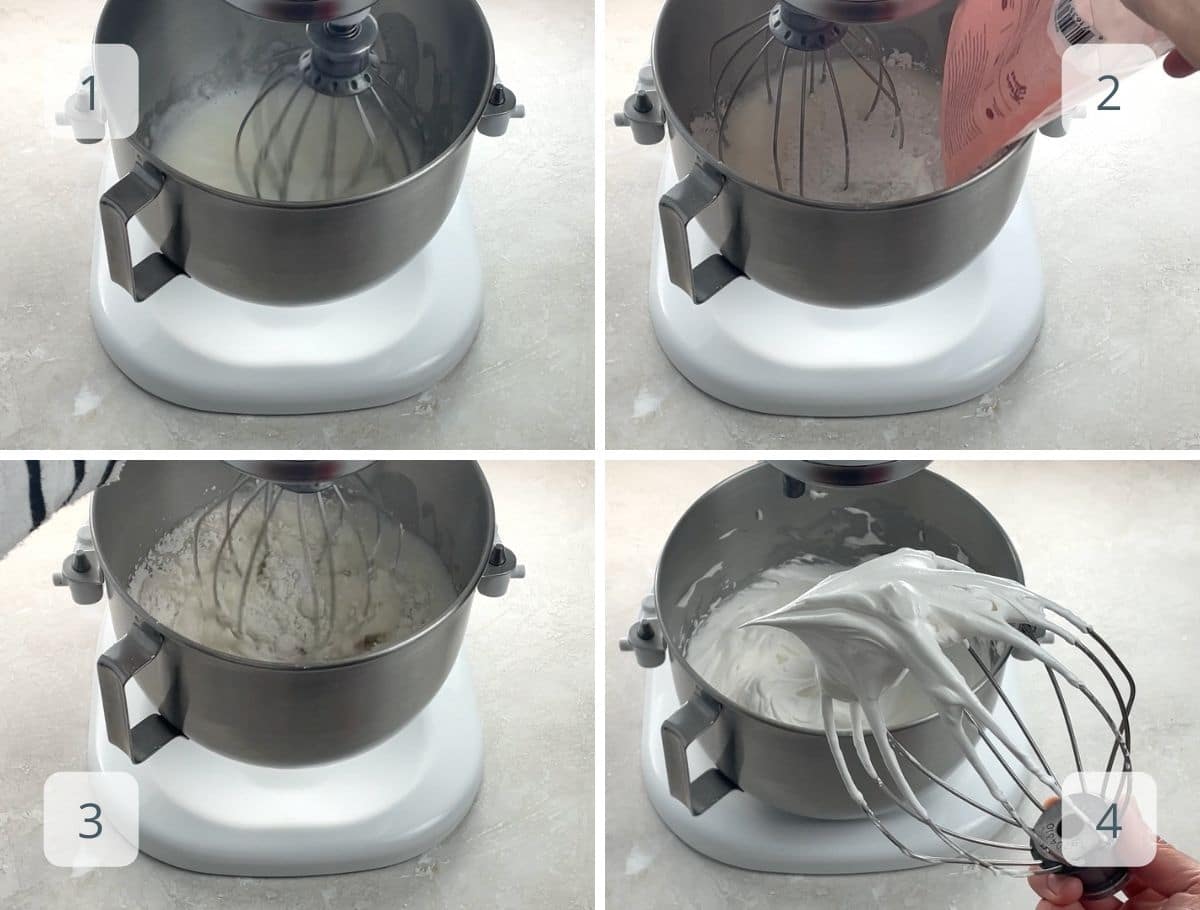
- In a stand mixer fitted with the whisk or a large mixing bowl using an electric hand mixer, whip the water and meringue powder until foamy.
- Gradually add the powdered sugar and mix on low speed at first to prevent a sugar shower.
- Once incorporated, mix on high until icing looks white, glossy, and thick.
- Your icing is ready to use, color, or thin. Refer to the section below for more information.
How to use it
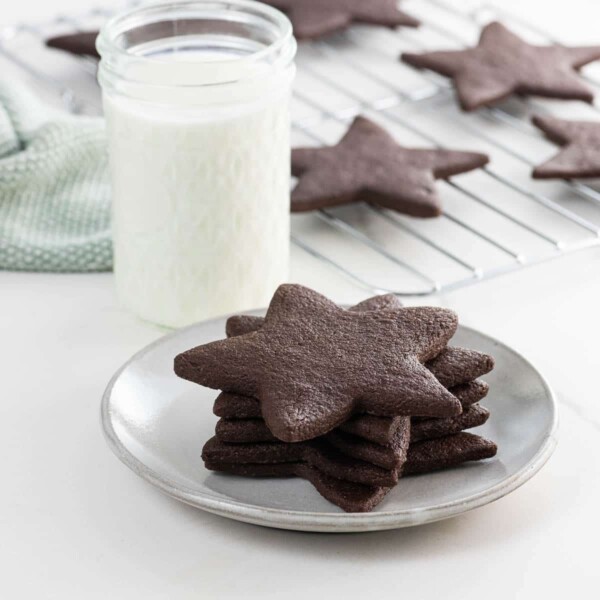
Here’s an overview of how you can use this recipe to decorate Christmas cookies. No special skills required — or possessed, believe me. This is the cookie recipe we make and adore (and here’s a rockin chocolate version), but you can use your favorite, from sugar cookies to gingerbread.
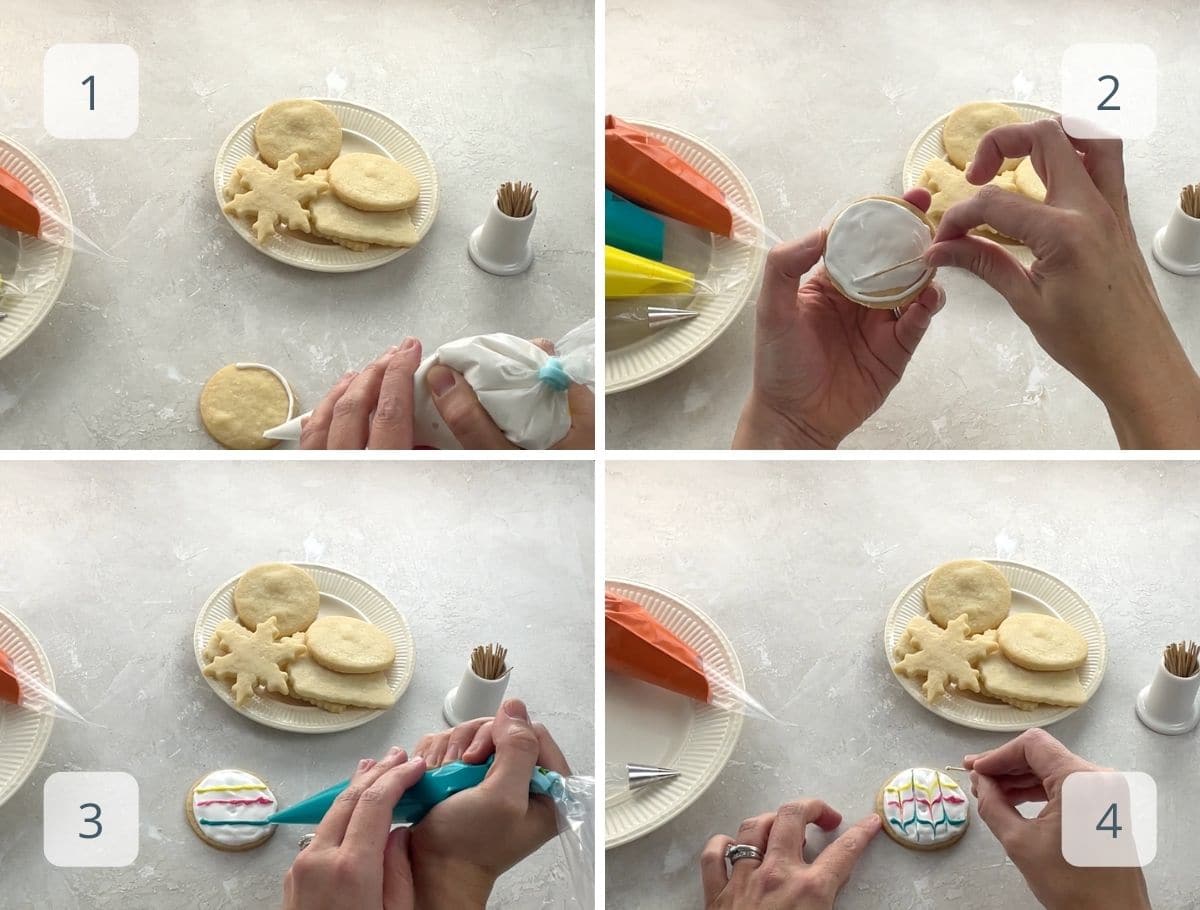
- If you’ve created two consistencies (see below to learn more), use the thicker one to draw a line around the edge of your cookie.
- Use the thinner icing to “flood” inside the line. A toothpick or skewer can help nudge the icing across the surface of the cookie. Gently rap cookie on table to surface any air bubbles, and then use the toothpick to smooth them.
- Depending on the look you’re going for, you’ll either wait for the first coat to dry before proceeding, or add decorations right away. For textured icings with multiple layers, let the base coat dry first. If you plan to swirl or otherwise incorporate additional colors into a single layer, add them right away.
- Some beautiful techniques, like the feathering you see here (and basically everywhere) are remarkably easy to achieve. Just pipe a few colorful lines across the cookie while the base layer is still wet, and then drag your toothpick straight up and down between them to nudge the icing into a feathered shape.
Expert tips and FAQs
The line and flood method is exactly what it sounds like. Using one batch of icing, part of which you’ll thin slightly more than the rest, you’ll draw a line around the outside of each cookie and then flood the thinner icing inside the line to create a smooth surface.
For the cookies pictured above, the ornaments (shut up, you knew they were ornaments) use line and flood. The snowflakes simply use the thicker icing.
To achieve vibrant colors without incorporating too much additional liquid, use gel food coloring. You can find a wide variety of colors in the baking section of craft stores or online.
Within about 15 minutes, the icing will develop a very thin dry outer layer. Within an hour, it should be stable enough to pipe additional decorations on top.
Flood-consistency icing takes at least six hours to dry thoroughly, depending on thickness. It’s a very good idea to leave your decorated cookies out, uncovered, at room temperature overnight in a single layer to ensure they’re properly set.
You can use a hair dryer set to cool, slow speed, and held about a foot away from the cookies, or aim a fan set on low in the direction of the cookies. Proceed gingerly, though, to avoid damaging your designs.
Flavorings
To flavor your royal icing, all you need to do is add 1/2 to 2 teaspoons of a pure extract per batch (to taste). You can whip it right in when you add the powdered sugar. Pure extracts have a much better taste than imitation ones, but depending on the flavor, they may not be clear-colored. In some cases, you’ll need to make a choice between ever so slightly affecting the color of the icing and using a clear imitation extract.
Some favorites:
- Vanilla: Use 1 to 2 teaspoons, to taste
- Chocolate: Use 1 to 2 teaspoons, to taste
- Coffee: Use 1 to 2 teaspoons, to taste
- Peppermint: Use 1/2 to 1 teaspoon, to taste
- Lemon: Use 1/2 to 1 teaspoon, to taste
- Orange: Use 1/2 to 1 teaspoon, to taste
- Almond: Use 1/4 to 1/4 teaspoon, to taste
- Maple: For maple royal icing, you’ll proceed a little bit differently. Replace 1/4 cup of the water with 1/4 cup pure maple syrup. Thin as needed.
- Cinnamon, cardamom, gingerbread, speculoos, etc.: For flavors that use ground spices, add 1/2 to 1 teaspoon of the spice or spice blend and taste. These flavorings will of course leave speckles in your icing, but there’s nothing really wrong with that! If you’d prefer to avoid them, consider flavoring the cookies instead.
How to store royal icing
Biscuiteers royal icing or any version made with meringue powder can be stored in an airtight container at room temperature for up to two weeks. The same science that makes it dry on your cookies will also make it dry in the container if it has contact with air, so it’s important to put a layer of plastic wrap directly over the surface before closing the container.
Before using, give the icing a quick whip.
If it’s already in piping bags, that’s fine, since they’re basically airtight containers that touch the surface of the icing. You’ll notice some separation over time, but you can use your fingers to massage the icing right in the bag and remix it.
Store icing made with fresh egg whites in the refrigerator for up to three days, using the same techniques.
Bonus tip: Gingerbread house construction
You can use this recipe as the snow-covered cement for your gingerbread house if you like. The thicker version made with 1/2 cup of water should be just about perfect. Depending on your environment, you may want to start with just 1/3 cup of water and test it, then thin as needed to your preferred consistency.
More favorite frostings
- Classic and chocolate American buttercream
- Stable whipped cream cheese frosting
- Raspberry whipped cream
- Strawberry sauce for cheesecake or ice cream
Summarize & Save This Content On

Biscuiteers Royal Icing Recipe
Equipment
Ingredients
- ½ cup (120 ml) water, plus more as needed
- 3 tablespoons (27 grams) meringue powder
- 1 pound (454 grams) confectioner’s sugar
- Gel food coloring
Instructions
- Making the icing
- Place the water and meringue powder in the bowl of a stand mixer or a large mixing bowl. Using the whisk attachment or an electric mixer, beat ingredients together until powder has dissolved and mixture has become very foamy.
- Add the powdered sugar gradually and mix slowly at first to avoid a snow shower.
- When sugar is incorporated, raise speed to high and mix until icing is bright white, smooth, glossy, and the consistency of toothpaste.
- Using the icingWhat happens next depends upon how you'd like to use your royal icing. If you plan to do a lot of fine detail decorating, or if you're brand new to the line and flood technique, it's a good idea to create two different thicknesses of each color — one for lining and details, one for flooding. The icing that you have right now should be a good consistency for lining and details, but depending on environmental factors, you may want to add a bit more water. If it seems too thick to comfortably squeeze out of a piping bag, go ahead and whisk in more water a tablespoon or two at a time until it's reasonable to work with.
- If you're a little more comfortable with piping, and/or if you plan to create mostly patterned decorations in a single layer, you can use a single, thinner consistency for all of your decorating. In my environment in the wintertime, flood icing usually requires up to a full cup of water (total). Proceed slowly until you learn what works for you.
- Transfer a small amount of the icing to a smaller bowl and mix in a few drops of the color you'd like to use to line your cookies. Spoon this icing into a disposable piping bag and snip off a tiny bit of the bag's tip. Draw a line of icing as close as you'd like to the outer edge of your cookie, making sure to connect the line's ends to each other so the flood icing won't have any gaps to flow out.
- In another small bowl, mix some more of the icing with a few drops of the color you'd like to use to flood your cookies, along with two additional teaspoons of water. This icing should be thin enough to spread slowly and slightly across the surface of the cookies, but no thinner than that. You may need to experiment a little to find the consistency that's best for your humidity and, ahem, skill level. Pour this icing into another piping bag or better yet a squeeze bottle.
- Squeeze some flood icing onto the surface of a cookie, filling in the entire surface inside the line. You can use a toothpick to fill any gaps that don't fill themselves and gently rap the cookie onto the work surface if you're brave and want a perfectly smooth finish.
- Depending on the look you're going for, you'll either wait for the first coat to dry (for about an hour) before proceeding, or add decorations right away. For textured icings with multiple layers, let the base coat dry first. If you plan to swirl or otherwise incorporate additional colors into a single layer, or add sprinkles or other decorations, do it right away.
Notes
- For flavorings, please refer to the section of the blog post that discusses it.
- Within about 15 minutes, the icing will develop a very thin dry outer layer. Within an hour, it should be stable enough to pipe additional decorations on top. Flood-consistency icing takes at least six hours to dry thoroughly, depending on thickness. It's a very good idea to leave your decorated cookies out, uncovered, at room temperature overnight in a single layer to ensure they're properly set.
- Icing can be stored in an airtight container at room temperature for up to two weeks. The same science that makes it dry on your cookies will also make it dry in the container if it has contact with air, so it's important to put a layer of plastic wrap directly over the surface before closing the container. Before using, give the icing a quick whip. If it's already in piping bags, that's fine, since they're basically airtight containers that touch the surface of the icing. You'll notice some separation over time, but you can use your fingers to massage the icing right in the bag and remix it.
- Here's the recipe for our Easy Christmas Cookies and for Chocolate Shortbread.
Nutrition
Nutrition information is automatically calculated, so should only be used as an approximation.




I wrote this cool recipe in my art project. Thanks, the cookies where yummy.