This post may contain affiliate links. Learn more.
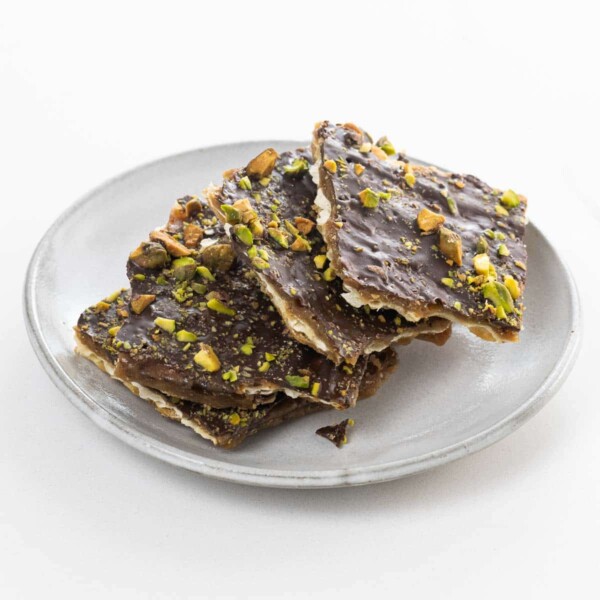
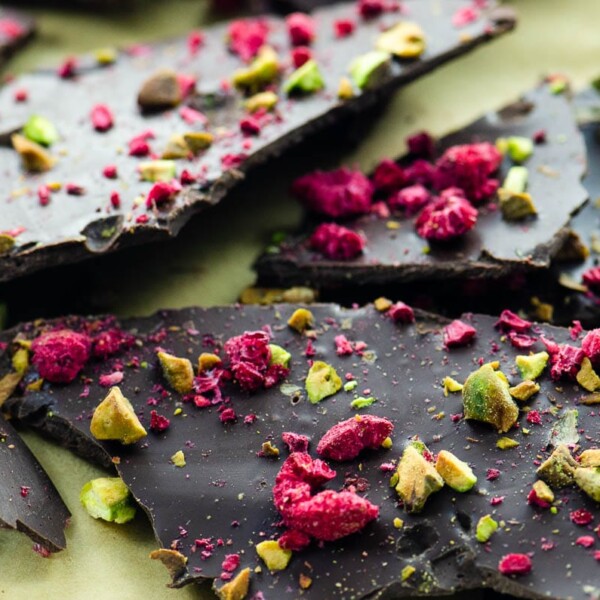
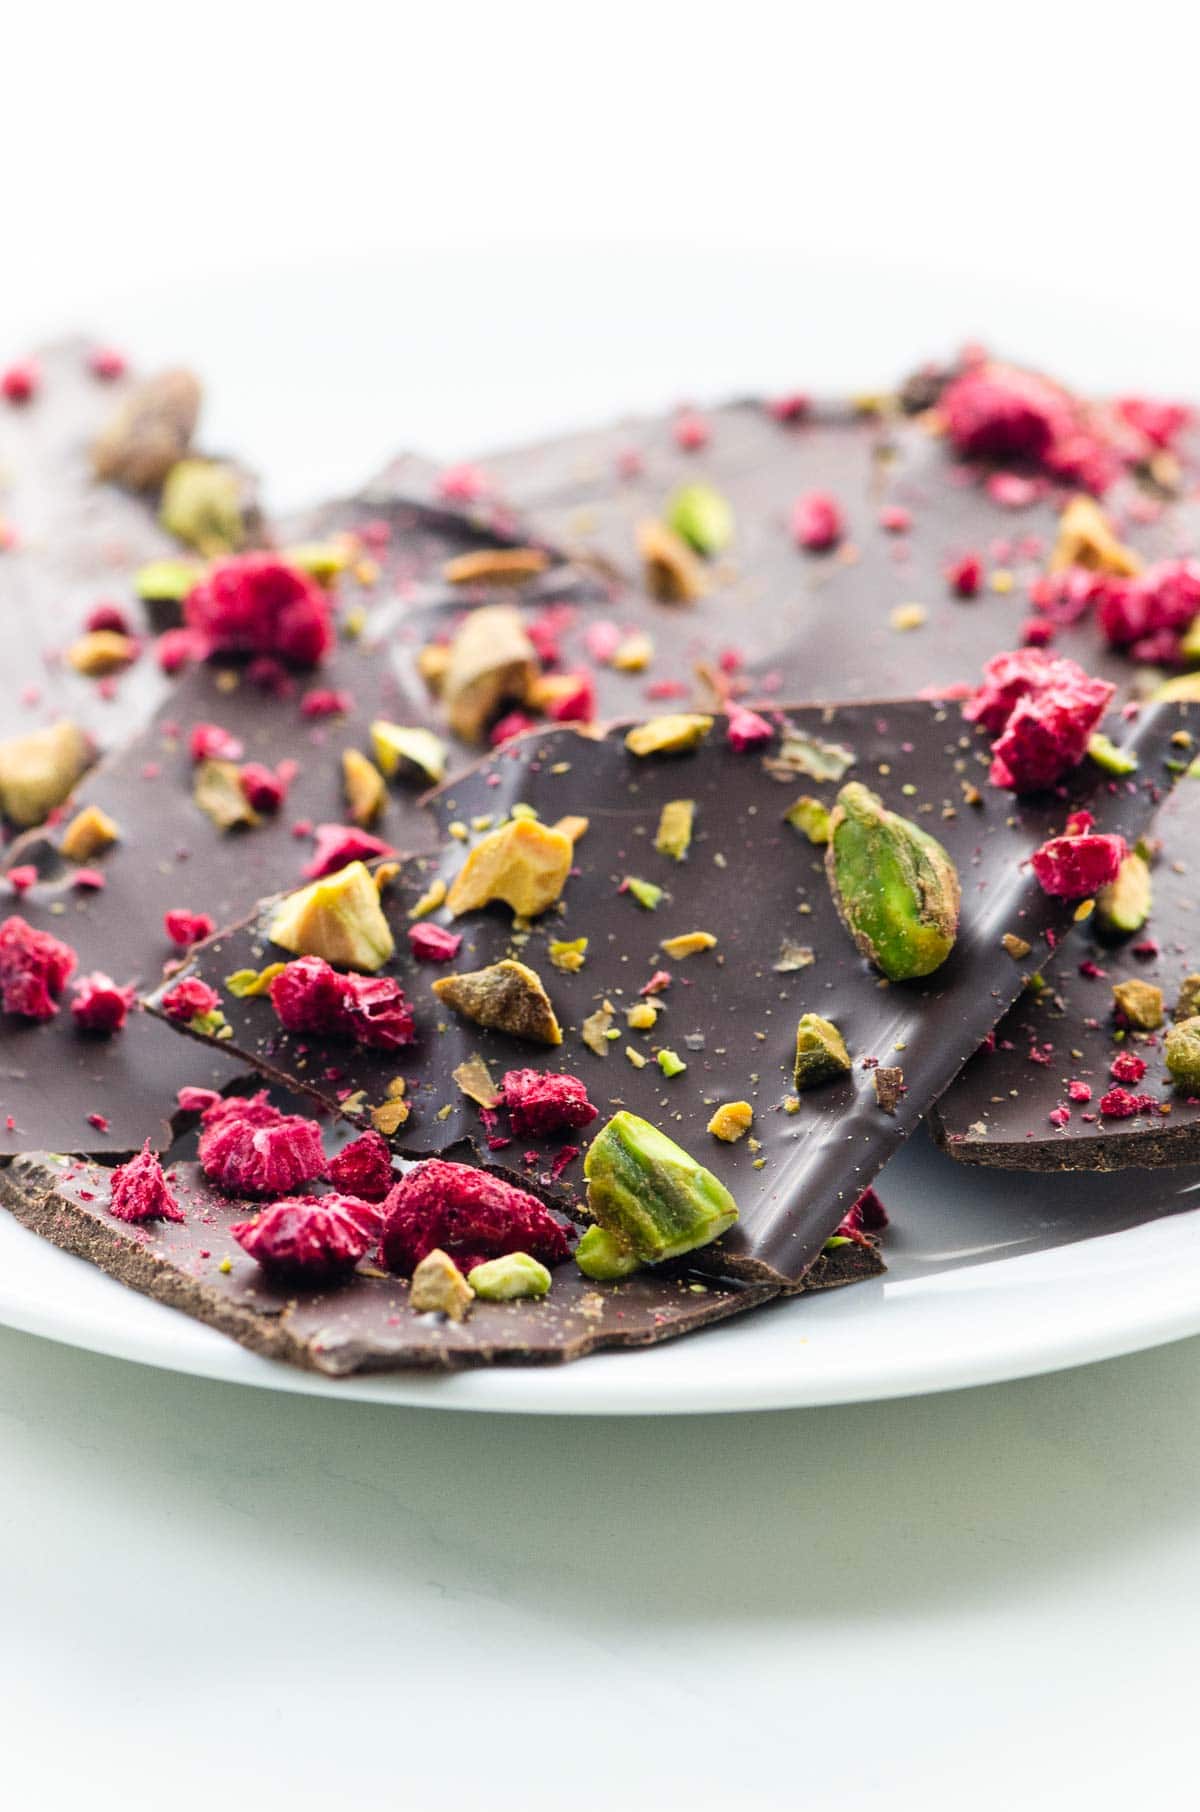
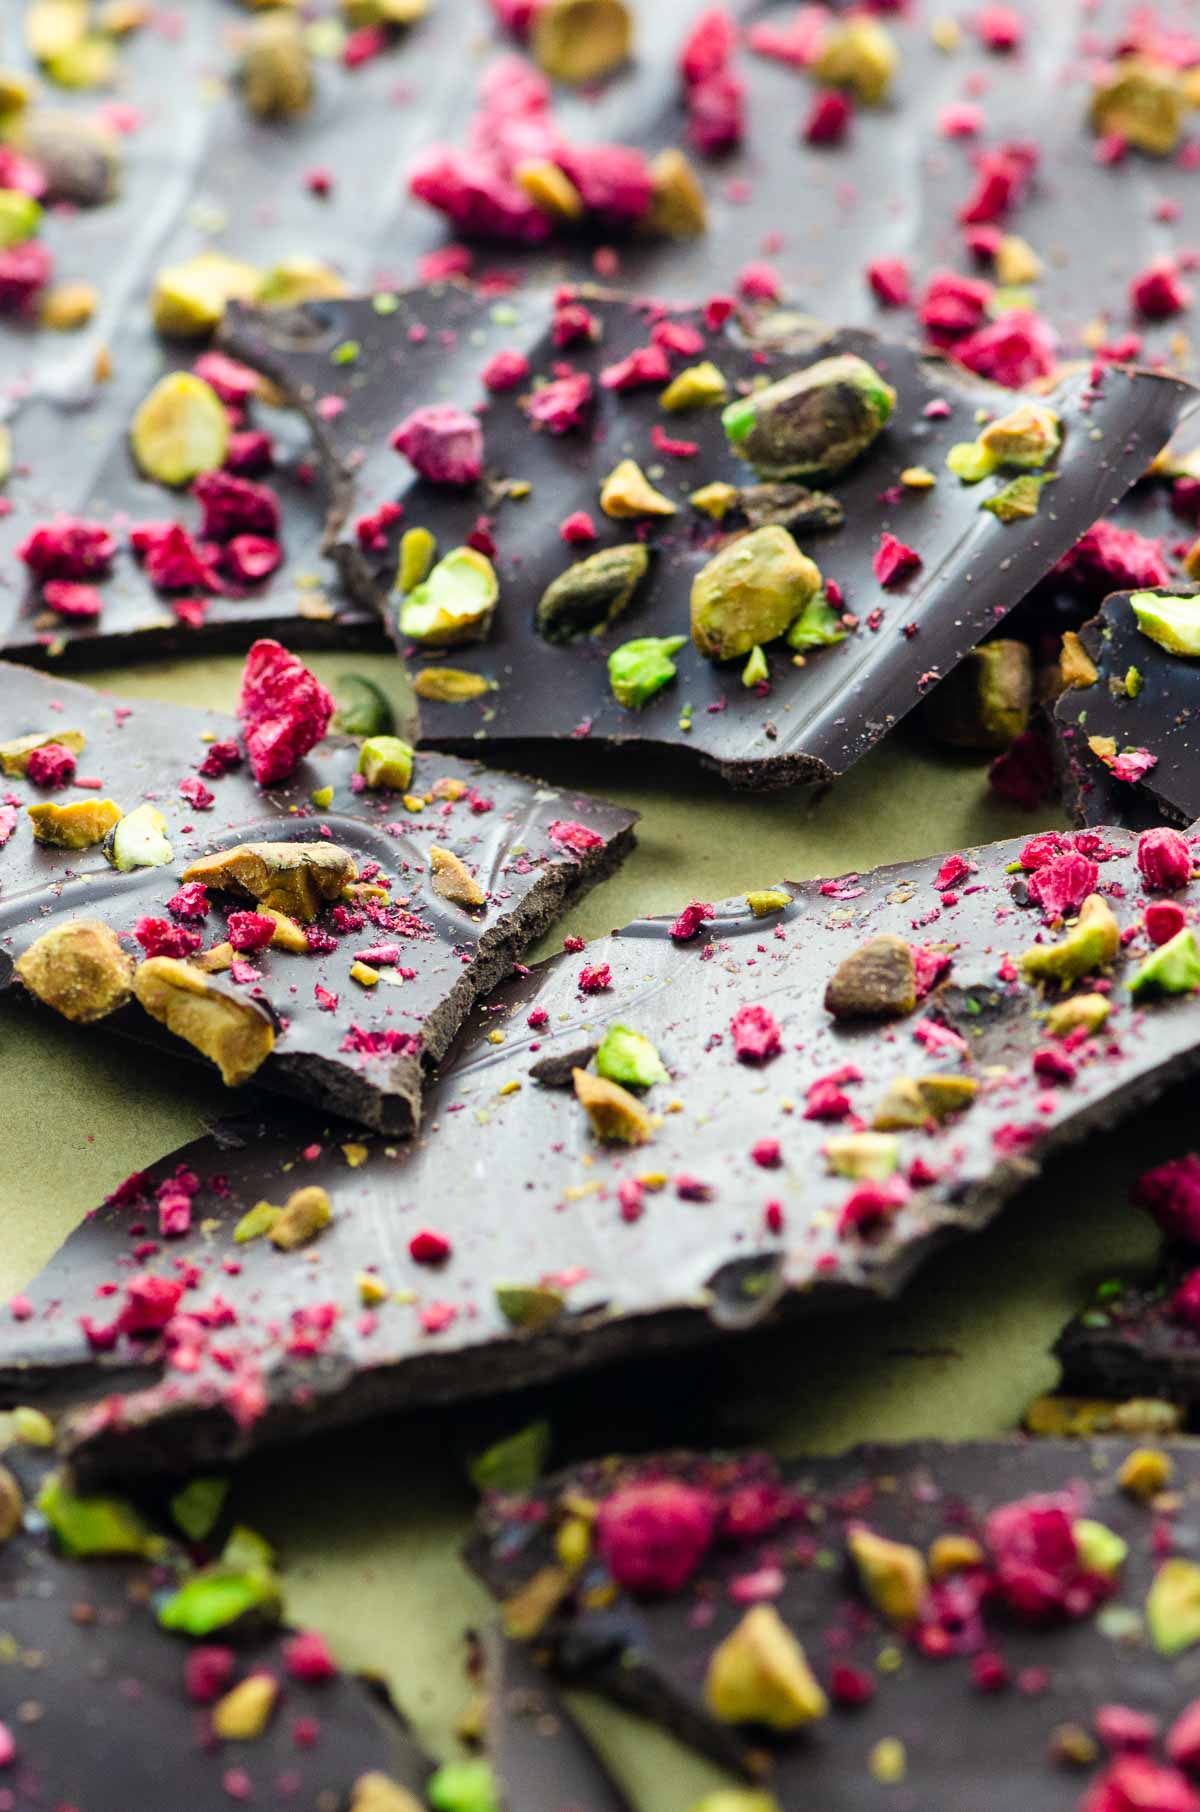
This beautiful red and green Christmas bark is made from just three ingredients: Dark chocolate, chopped pistachios, and freeze-dried raspberries. Make the super-quick and easy (and totally great) version, or take it up a notch to professional level with tempered chocolate. The choice is yours.
Why we love this recipe
This dark chocolate bark has everything. It’s quick and easy. It’s gorgeous and Christmas-colored. It’s gift-worthy. It’s a little bit:
- Sweet (but not too sweet) from the deep, dark chocolate
- Salty from the salted pistachios (and add a sprinkle of flaky sea salt if you like)
- Tangy from the raspberries
- Nutty
- Fruity
In short, it’s the whole package.
What you’ll need
Here’s a glance at the mere three ingredients you’ll need to make a great batch of Christmas bark.
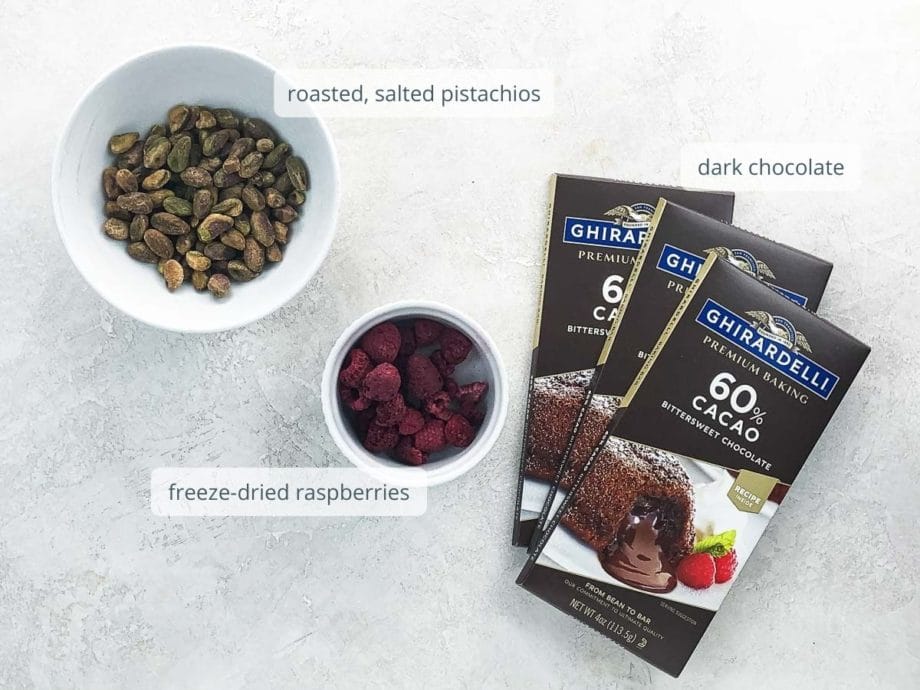
- Chocolate: I like to use at least 60% dark chocolate for this recipe. The more the merrier. Since there aren’t a lot of ingredients, use ones that you really love.
- Pistachios: Roasted, salted pistachios contribute both a beautiful set of flavors and the green that makes this bark Christmas-forward. You can substitute other nuts if you like.
- Raspberries: Freeze-dried raspberries have a gorgeous, tangy, concentrated flavor and don’t contribute unwanted moisture. You can use freeze-dried strawberries instead if you like.
How to make it
Here’s what you’ll do to make a great batch of Christmas bark.

- If you’re making the basic version of Christmas bark, finely chop all the chocolate. If you’re tempering, finely chop 2/3 of it and leave the rest of it in big chunks.
- Melt all the chocolate, or temper it according to the instructions in the recipe card (and the section below).
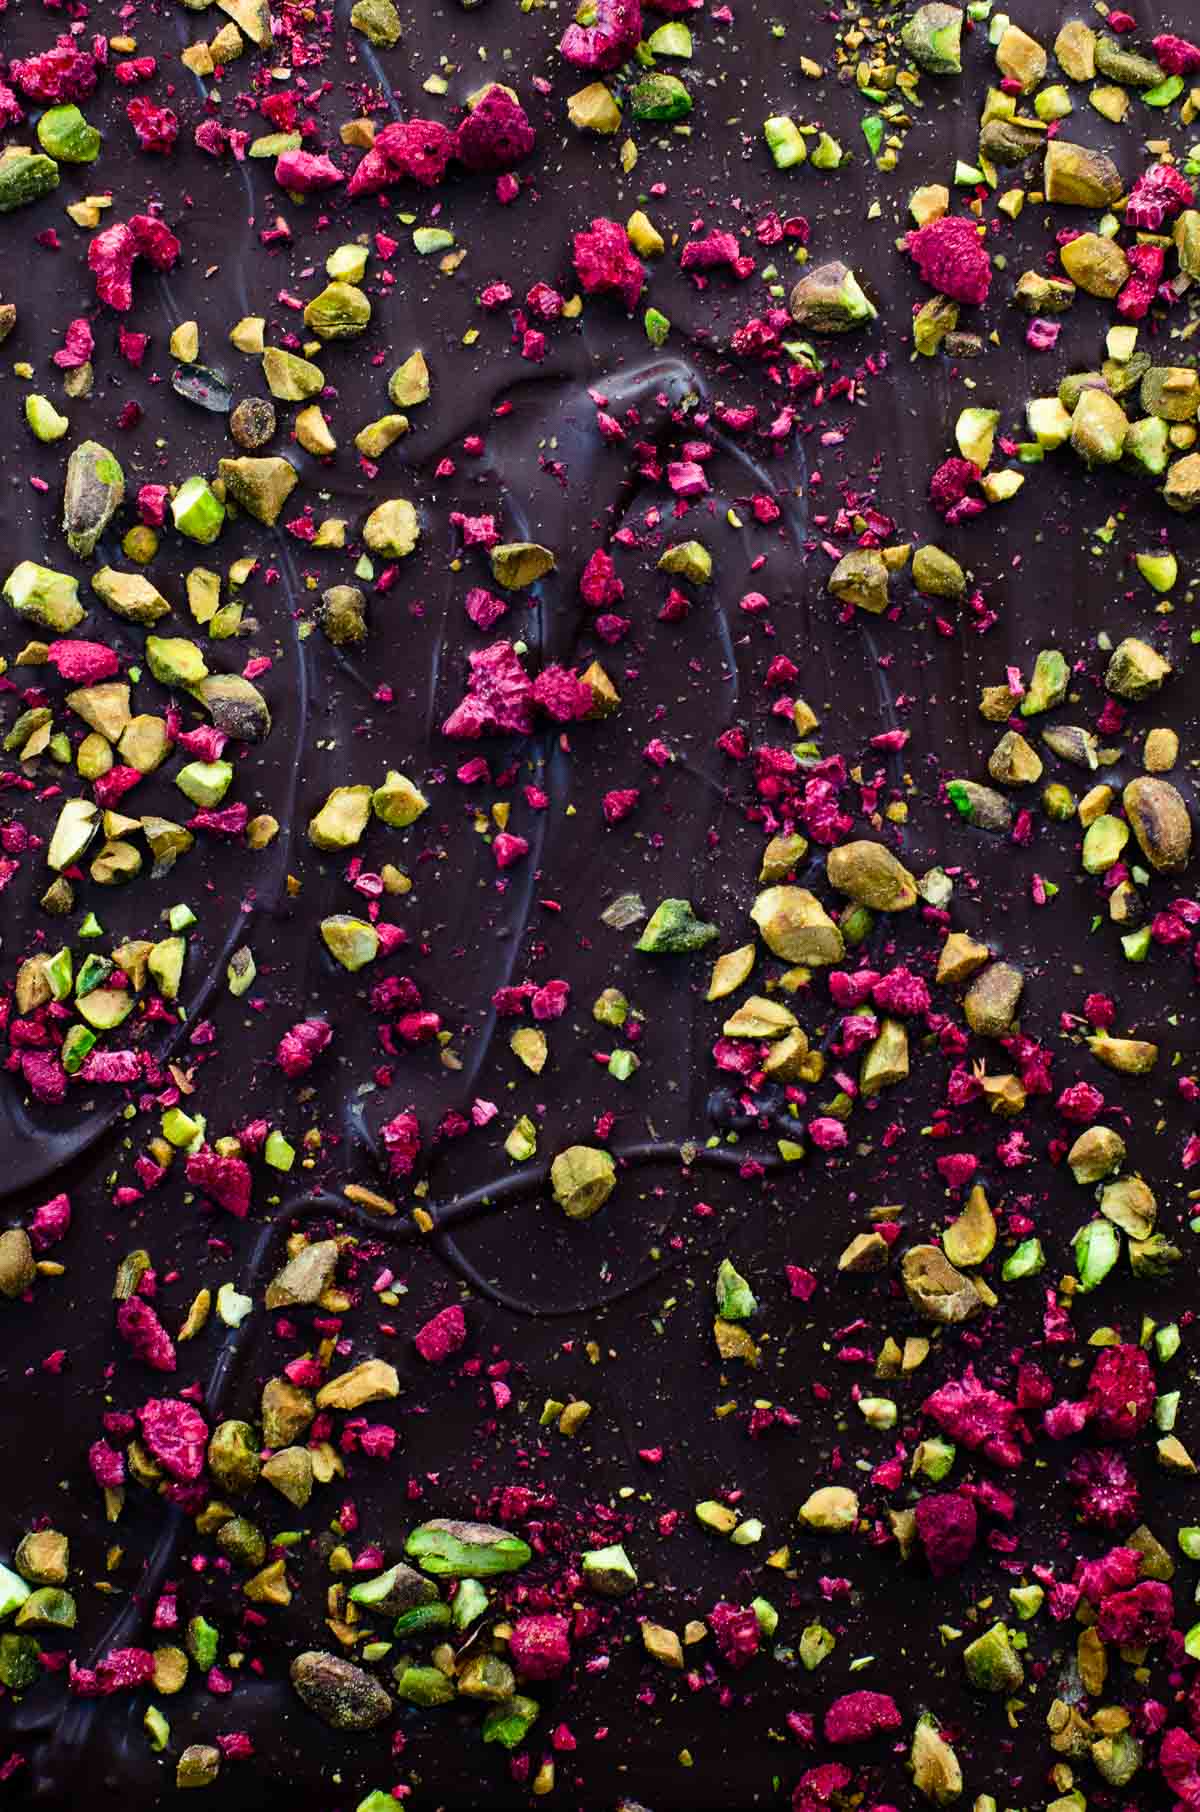
- Spread the melted chocolate onto a parchment-lined baking sheet.
- Sprinkle with the chopped nuts and raspberries, let cool, and then break into shards. That’s it!
How to temper dark chocolate
Tempering is not strictly necessary when making chocolate bark, but it gives the final product a more professional look and feel. The process is a bit exacting, but dark chocolate is the most forgiving kind of chocolate to temper. You’ll need a thermometer.
What is tempering?
The word “tempering” comes from the process of controlling the temperature of chocolate. By raising, then lowering, and then slightly raising the temperature of your chocolate, you’ll nudge the crystal structure of the cocoa butter into behaving well. Tempered chocolate is smooth and shiny, stable at room temperature so it won’t get all over your hands, and beautifully snappy when you break or bite into it.
Tempering step by step
- Chop 2/3 of the chocolate, leaving the other 1/3 whole or in large pieces.
- Heat the chopped chocolate, stirring gently and frequently, until it reaches 120°F. Heat either in a double boiler or in the microwave on half power in 30- to 60-second bursts. (To make a double boiler, set a wide heatproof glass or metal bowl over a pot of simmering water, making sure the bottom of the bowl does not touch the water.)
- “Seed” the melted chocolate with the solid chocolate to encourage the formation of crystals. Place the solid chocolate into the melted chocolate and stir. Keep going until the temperature is reduced to 82°F. If there is leftover solid chocolate at this stage, remove it.
- Place the melted chocolate briefly back over pot or in the microwave. Raise heat again to 90°F. The chocolate is now ready to use.
Tempering protips
Chocolate and water do not mix. Work with completely dry tools and be sure not to let any of the water from the pot enter the bowl. I like to use a bowl with a wide lip (like the one in the video) to make this easier.
You can test whether the chocolate is tempered by smearing a very little bit of it onto the prepared baking sheet and waiting for it to set. If it looks shiny like a fancy candy or good chocolate bar, it’s properly tempered and ready to use. If not, you can repeat the tempering process.
Expert tips and FAQs
It’s really up to you. The bark will be great either way. If you’ll be giving it as gifts, I recommend tempering because it’s less messy and will stay good longer. Plus it’s a little more impressive, if you’re into that sort of thing.
Absolutely. Dark chocolate bark is highly amenable to additions and substitutions.
If you want to keep things red and green, you could swap in pepitas for the pistachios and/or freeze-dried strawberries or regular dried cherries or cranberries for the raspberries.
If you’re happy with other colors, the sky’s the limit. Think about the amount of crunch, savoriness, tang, and sweetness you want the final result to include, and make sure not to add moisture. Other than that, you’re free to play.
Some favorites include:
Chopped nuts or seeds, especially: Walnuts, pecans, hazelnuts, almonds, macadamia nuts, sunflower seeds, sesame seeds, pepitas
Dried fruits, especially: Chopped apricots, figs, cherries, cranberries, strawberries, crystallized ginger, candied citrus peel
Crunchy elements, especially: granola, crushed potato chips, crushed corn nuts
Flaky sea salt, smoked salt, bacon bits
If you’ve tempered the chocolate, it will keep tightly sealed at room temperature for a month or more. If not, eat it within a week or two.
More favorite holiday baking
- Decorated shortbread cookies
- Ugly sweater cookies
- Candy cane chocolate cupcakes
- Peppermint chocolate meringue kisses
- Gingerbread trifle
- Peppermint Oreo truffles
- Jam sandwich cookies
- Gingerbread spice donuts
- Matzo crack
Summarize & Save This Content On

Christmas Bark (Dark Chocolate Bark with Pistachio and Raspberry)
Ingredients
- 1 pound (454 grams) dark chocolate
- ¼ cup (28 grams) shelled, roasted, salted pistachios
- ¼ cup (10 grams) freeze-dried raspberries
Instructions
- Basic method
- Chop chocolate, pistachios, and raspberries separately.
- Melt the chocolate in a double boiler or on half power in bursts of 30 to 60 seconds the microwave, stirring gently and frequently either way.
- Pour melted chocolate onto a rimmed baking sheet lined with parchment and spread into an even layer. You can choose the thickness — I prefer something between 1/4 and 1/8 inch.
- While chocolate is hot, sprinkle with chopped nuts and raspberries.
- Let rest until completely set, then break into shards.
- Tempered method
- Finely chop 2/3 of the chocolate, leaving the rest whole or in large chunks. Chop pistachios and raspberries separately.
- Heat the chopped chocolate in a double boiler or on half power in bursts of 30 to 60 seconds the microwave, stirring gently and frequently either way, until it reaches 120°F.
- Place the solid chocolate into the melted chocolate and stir until the temperature is reduced to 82°F. If there is any remaining solid chocolate at this stage, remove it.
- Heat the melted chocolate again very briefly over the double boiler or in the microwave, just until it reaches 90°F. Chocolate is now tempered and ready to use.
- Pour tempered chocolate onto a rimmed baking sheet lined with parchment and spread into an even layer. You can choose the thickness — I prefer something between 1/4 and 1/8 inch.
- While chocolate is hot, sprinkle with chopped nuts and raspberries.
- Let rest until completely set, then break into shards.
Notes
- I’ve used 60% dark chocolate here. You can use whatever percentage you like. With so few ingredients, be sure to choose ones you really love.
- To make a double boiler, set a wide heatproof glass or metal bowl over a pot of simmering water, making sure the bottom of the bowl does not touch the water.
- Chocolate and water do not mix. Work with completely dry tools and be sure not to let any of the water from the pot enter the bowl. I like to use a bowl with a wide lip (like the one in the video) to make this easier.
- You can test whether the chocolate is tempered by smearing a very little bit of it onto the prepared baking sheet and waiting for it to set. If it looks shiny like a fancy candy or good chocolate bar, it’s properly tempered and ready to use. If not, you can repeat the tempering process.
- I find that salted pistachios lend just the right amount of savoriness to this recipe, but if you’re into salted sweets you can add a sprinkle of a flaky sea salt like Maldon.
Nutrition
Nutrition information is automatically calculated, so should only be used as an approximation.