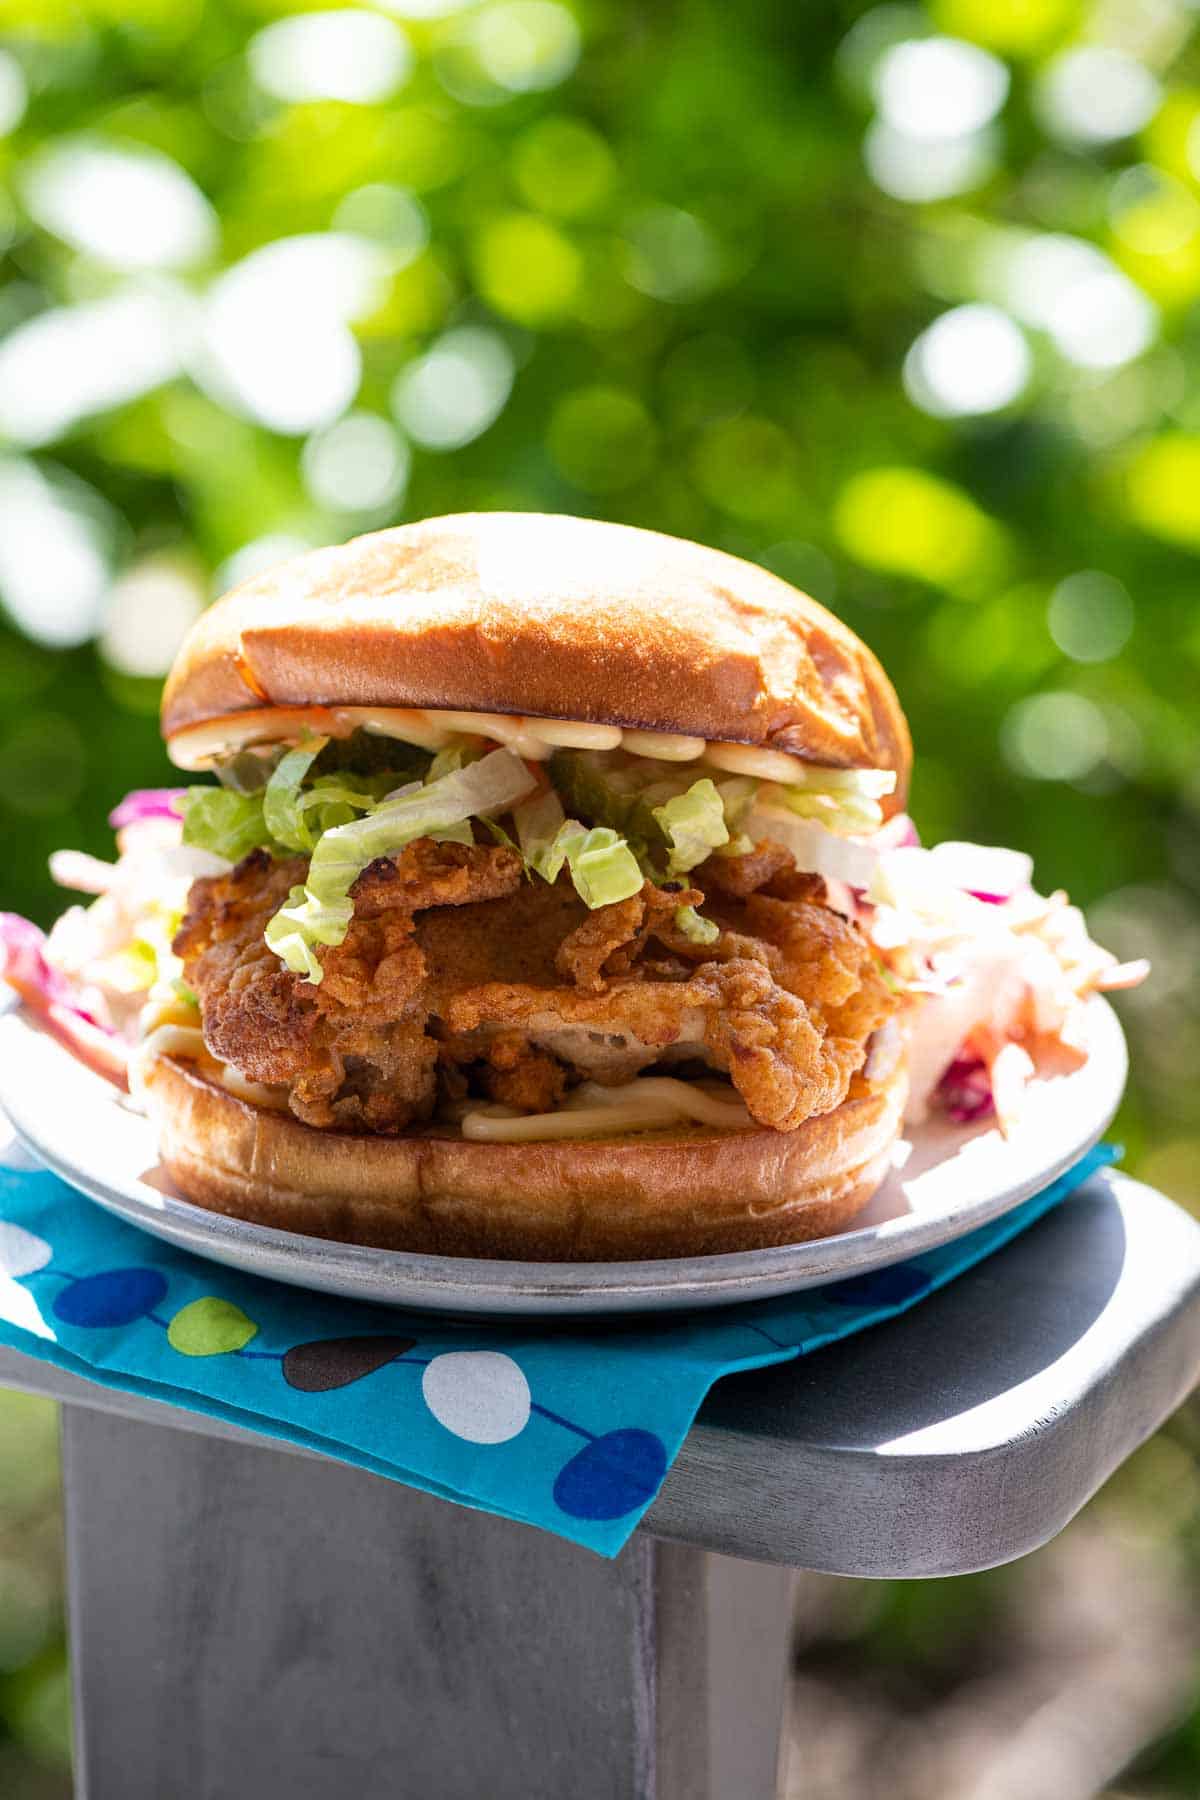
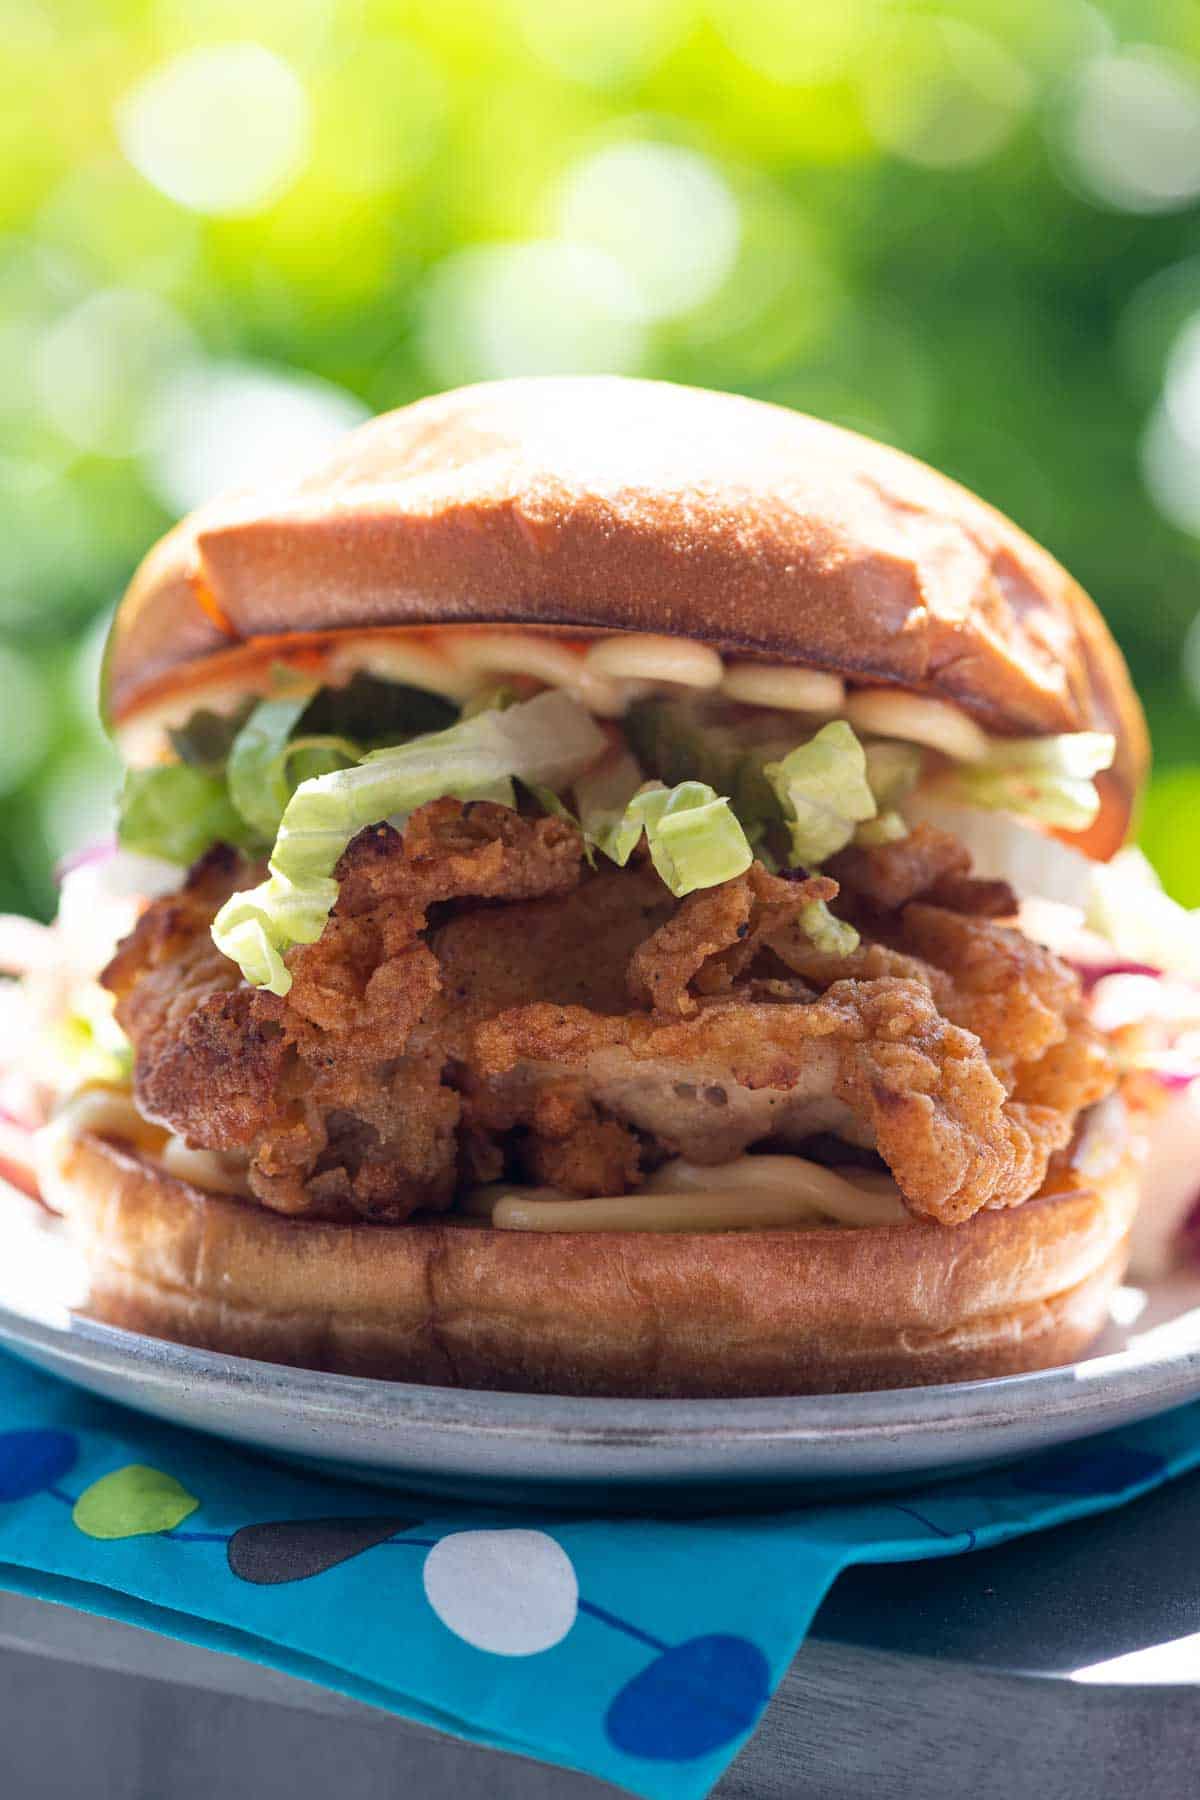
This perfectly calibrated crispy chicken sandwich recipe is tender, flavorful, and absolutely classic. Includes lots of optional additions.
Why we love this recipe
Fast food chains and gourmet food trucks may compete these days for the best crispy chicken sandwich recipe, but the origins of this dish go way back into American history. Like so many good things, fried chicken sandwiches have their true roots in African-American communities throughout the south. (You can learn more here if you like.)
This recipe draws on a wide spectrum of influences and lands in a place that I'm just so happy with. It's:
- Super-flavorful and well-balanced
- Not one bit more complicated than it needs to be
- A perfectly classic little gem as-is
- Yet amenable to all your wildest additions and variations
I first published a version of this recipe here back in 2017. I've since updated the post for clarity and made substantial changes to the recipe itself. If you're looking for the earlier version, you can now find it here.
What you'll need
Here's a glance at the ingredients you'll need to make this recipe.
For the chicken
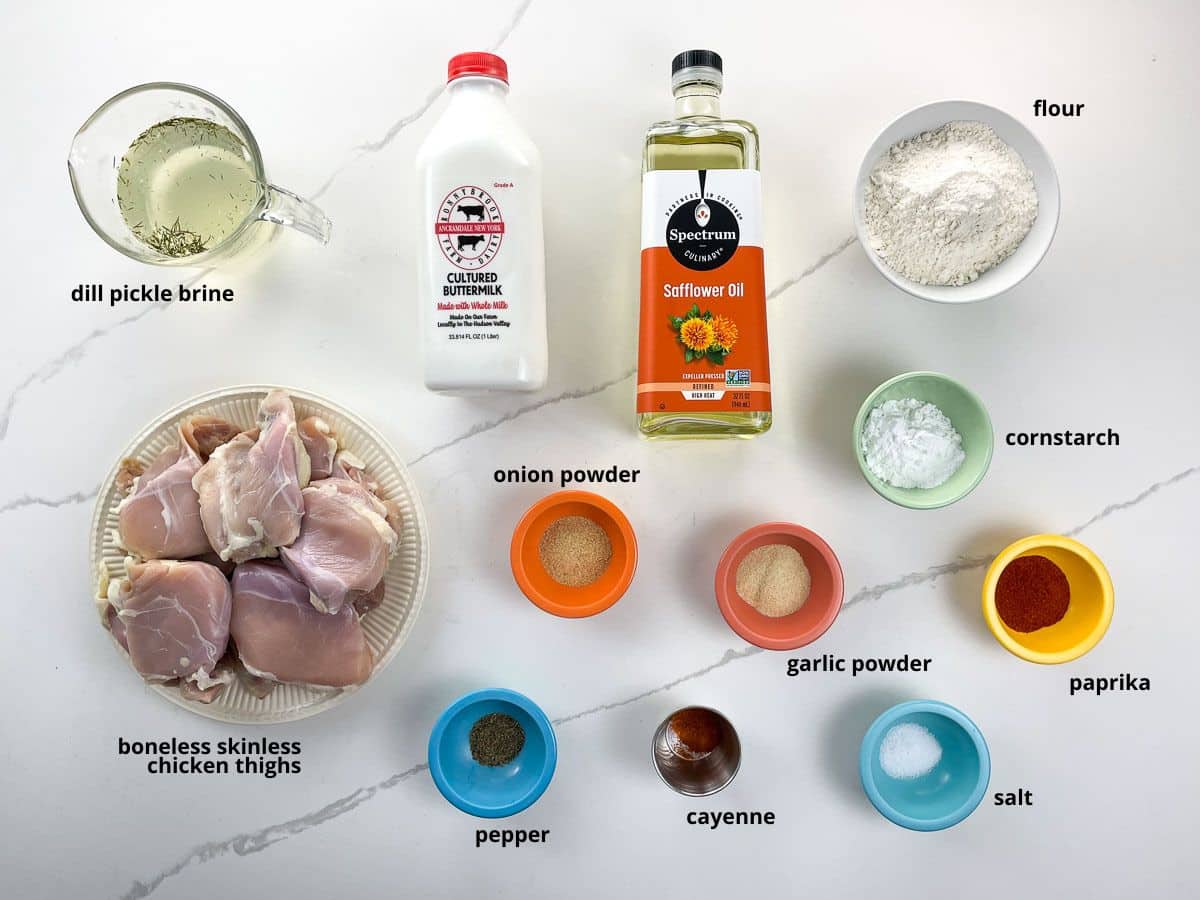
- The first key to this recipe is to start with chicken thighs rather than breasts. They're the perfect size, juicy and flavorful, and much harder to overcook. You'll definitely want boneless ones, and I almost always use skinless thighs too — they're easy to find and work beautifully. If you like, you can use skin-on thighs for even more richness and batter-grabbing nooks and crannies.
- Your next, wildly efficient move is to use dill pickle brine to brine the chicken. This process locks in flavor and tenderness like you wouldn't believe. And since pickle slices are already part of the recipe, it makes so much sense in terms of both economy and flavor layering. If you've never tried this move before, you might find it's a game-changer that you'll want to incorporate into other chicken recipes, too.
- Buttermilk coats the brined chicken and helps a nice thick layer of breading adhere. It contributes both flavor and an extra measure of tenderness. For this recipe, it's best to use real buttermilk (which is nice and thick) rather than one of the DIY substitutes that you may have used in baking from time to time.
- The base of the breading is a combination of good old all-purpose flour and some cornstarch, which contributes lightness and tons of crisping power. Beyond that, all you need is the beautifully balanced collection of classic seasonings pictured above — which you probably have in your spice collection already.
- Safflower oil is my high-heat, neutral-tasting vegetable oil of choice. You can use that or sunflower, canola, peanut, vegetable oil blend, or any other refined oil with a neutral taste and very high smoke point.
For the sandwiches
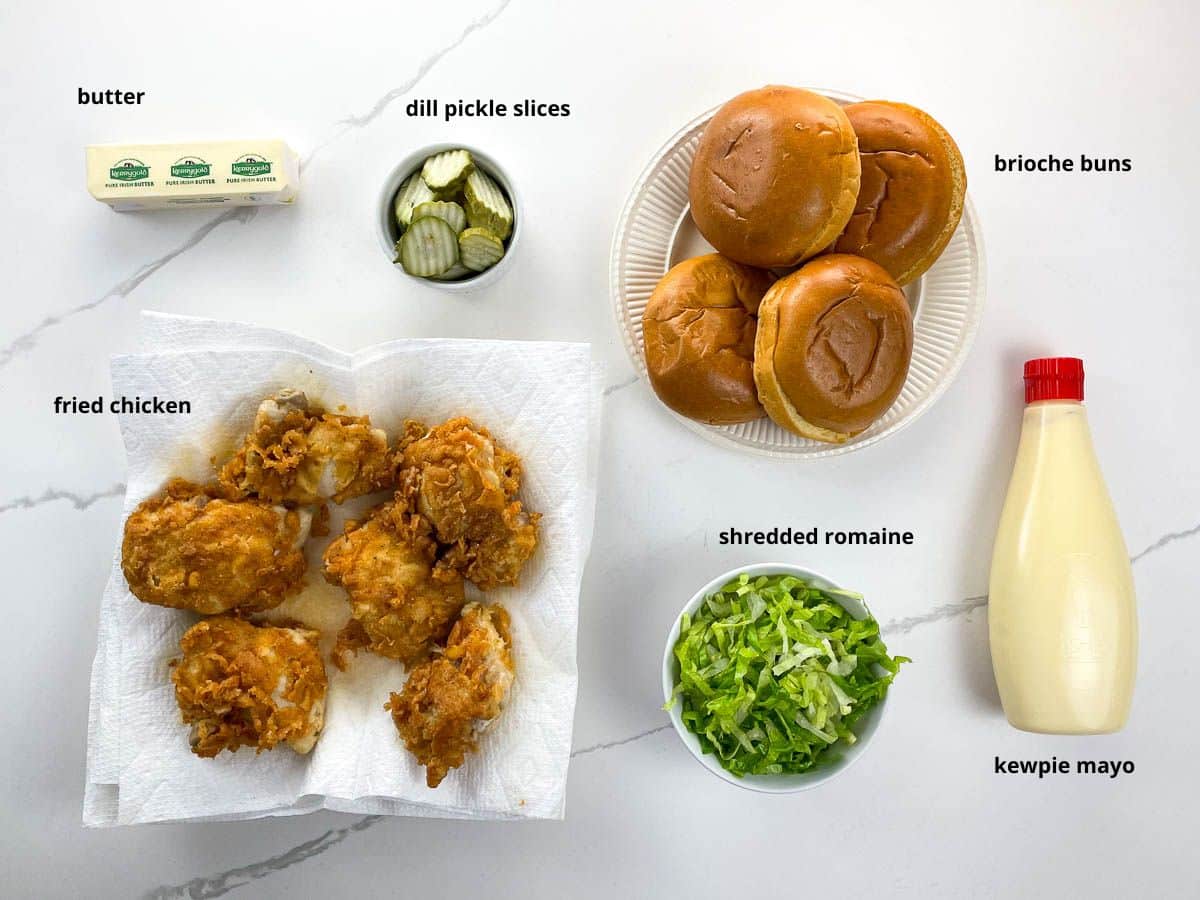
- Nice, flavorful, soft sandwich rolls contribute just the right vibe. Think brioche or potato rolls for maximum flavor. If you really want to kick things up, you can make your own.
- You'll griddle the rolls with a little bit of good butter. Here and virtually everywhere, I start with a cultured, salted butter from grass-fed cows. This sounds fancy but doesn't have to be. Kerrygold, for example, is sold in most supermarkets at a reasonable price.
- Kewpie is a Japanese brand of mayonnaise that’s creamier, tangier, and higher in umami than American mayo. It’s made with egg yolks instead of whole eggs and has a slightly thinner consistency. It's worth seeking out, but you can use a regular good-quality supermarket mayo if you want.
- Shredded romaine adds a little bit of lightness and crunch without overwhelming the sandwich. You'll simply slice a few leaves crosswise into thin ribbons to produce the perfect shreds.
- Your favorite brand of dill pickle slices heighten the whole experience just enough. You can even make your own if you like.
My favorite sources for meat & pantry staples
For years, I've been sourcing our meat from ButcherBox. We love this curated meat delivery service, which provides grass-finished beef, heritage breed pork, organic chicken, and more from small farms direct to the customer. You can learn more in my extensive Butcher Box review and unboxing.
I love Thrive Market for a wide variety of products. Often described as one part Whole Foods, one part Costco, they're a membership-based online market for healthier products at discounted prices. Plus, they're mission-driven, engaged in the community, and not currently owned by a giant corporation. You can learn more in my Thrive Market review and unboxing.
How to make it
Here's an overview of what you'll do to make this fabulous crispy chicken sandwich. You can see the steps in action in the video that accompanies this post, and get all the details in the recipe card below.
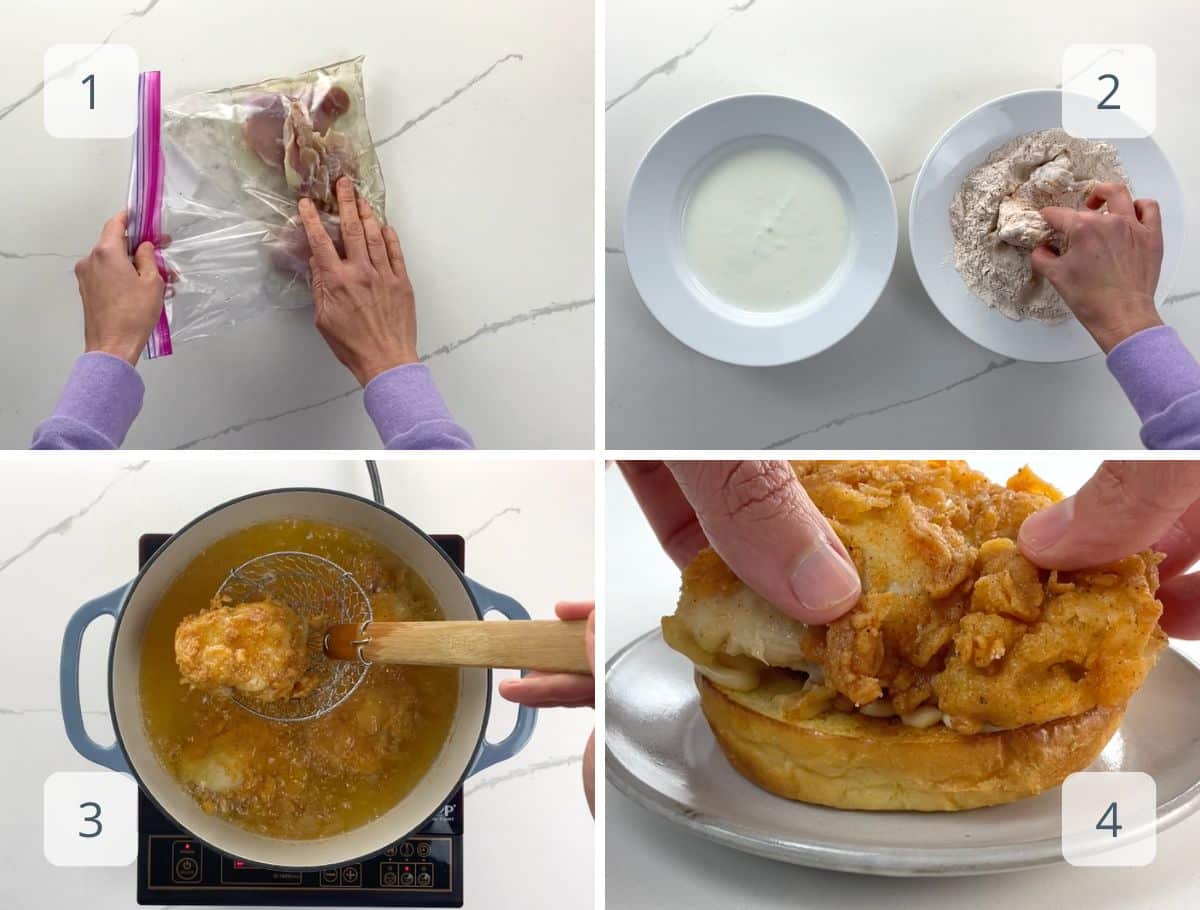
- First you'll brine the chicken.
- Dredge chicken through buttermilk and breading — you can repeat this step for a thicker crust if you like.
- Fry until golden and cooked through.
- Griddle the buns and assemble the sandwiches. That's it!
Suggested variations
If you'd like to amp things up, this crispy chicken sandwich recipe makes a fabulous starting point for all sorts of variations. Here are a few favorites:
- Buffalo: Dredge the fried chicken through a mixture of ¼ cup Frank's Red Hot and two tablespoons melted butter, and add some crumbled blue cheese.
- Pimento cheese: Swap out the mayo for a generous schmear of pimento cheese on each bun half. Consider adding a juicy tomato slice and some crisp-cooked bacon.
- Hot honey: Drizzle on plenty of your favorite hot honey, and consider swapping out the lettuce for slaw.
- Kimchi: Swap in your favorite kimchi for the lettuce and pickles, and add a slice or two of American cheese (I know — but it works).
- Reuben: Swap in Thousand Island dressing for the mayo, add some melty Swiss cheese, and swap in slaw for the lettuce if you like.
Expert tips and FAQs
Like most fried foods, this recipe is at its best shortly after emerging from the kitchen. I don't recommend going out of your way to make it in advance. That said, if you really need to fry the chicken ahead of time, you can do so up to a couple of hours in advance, then reheat and re-crisp in a 350°F oven. Assemble sandwiches shortly before serving.
Leftover fried chicken will keep in an airtight container in the fridge for a week. Reheat and re-crisp in the oven or toaster oven.
More favorite burgers & hot sandwiches
Hungry for more?
Subscribe to Umami Girl's email updates, and follow along on Instagram.

Crispy Chicken Sandwich Recipe
Ingredients
For the chicken
- 4 boneless (skinless chicken thighs)
- ½ cup (120 ml) dill pickle brine
- 1 cup (240 ml) buttermilk
- 1 cup (120 grams) flour
- ¼ cup (28 grams) cornstarch
- 1 tablespoon onion powder
- 1 tablespoon garlic powder
- 1 tablespoon paprika
- 1 teaspoon fine sea salt
- 1 teaspoon freshly ground black pepper
- ¼ teaspoon cayenne
- Safflower oil (for frying)
For the sandwiches
- 4 good sandwich rolls (such as brioche or potato)
- 4 tablespoons salted butter
- ½ cup Kewpie mayonnaise
- 1 cup dill pickle slices
- 1 cup shredded romaine lettuce
Optional additions
- American cheese slices
- Tomato slices
- Hot sauce or hot honey
- Ketchup
Instructions
For the chicken
- Place the chicken thighs into a shallow baking dish or gallon-sized zip-top bag.
- Pour in the pickle brine and turn chicken to coat.
- Marinate, turning, from time to time, for at least an hour, up to about eight hours.
- Pour the buttermilk into a wide, shallow bowl.
- Into another wide, shallow bowl, place the flour, cornstarch, onion powder, garlic powder, paprika, cayenne, salt, and pepper. Whisk together well.
- Set a 12-inch cast iron skillet or 5-quart Dutch oven over medium-high heat and pour in safflower oil to a depth of two inches. Heat to 350°F. (You'll cook the chicken at 325°F — starting the oil at a higher temperature accounts for the drop that will occur when you add the chicken.)
- Dip each thigh into the buttermilk and dredge to coat well, then allow any excess to drip off. Then dredge through the flour mixture, turning and patting as necessary to achieve a thick, even coating. If you like, you can repeat this process to create a double layer of extra-thick breading.
- When you've coated all four thighs, add them to the hot oil. Cook, turning every minute or two and adjusting heat as necessary to maintain the oil temperature at 325°F, until golden brown and cooked through to 165°F.
- Drain on paper towels and sprinkle with salt. I find that the chicken stays hot for quite a while, but if you're making multiple batches, you can place the cooked pieces on a metal rack set over a rimmed sheet pan and keep them warm in a 250°F oven.
For the sandwiches
- Spread a bit of the butter onto the inner face of each bun half.
- Warm a 12-inch skillet over medium heat. Four at a time, add the bun halves, buttered sides down, and toast until warm and golden brown.
- To assemble each sandwich, spread a tablespoon of mayo onto each bun half. Layer lower halves with fried chicken, pickle slices, and lettuce, dividing evenly among sandwiches. Top with remaining buns and serve.
Notes
- The first key to this recipe is to start with chicken thighs rather than breasts. They're the perfect size, juicy and flavorful, and much harder to overcook. You'll definitely want boneless ones, and I almost always use skinless thighs too — they're easy to find and work beautifully. If you like, you can use skin-on thighs for even more richness and batter-grabbing nooks and crannies.
- Your next, wildly efficient move is to use dill pickle brine to brine the chicken. This process locks in flavor and tenderness like you wouldn't believe. And since pickle slices are already part of the recipe, it makes so much sense in terms of both economy and flavor layering. If you've never tried this move before, you might find it's a game-changer that you'll want to incorporate into other chicken recipes, too.
- Buttermilk coats the brined chicken and helps a nice thick layer of breading adhere. It contributes both flavor and an extra measure of tenderness. For this recipe, it's best to use real buttermilk (which is nice and thick) rather than one of the DIY substitutes that you may have used in baking from time to time.
- The base of the breading is a combination of good old all-purpose flour and some cornstarch, which contributes lightness and tons of crisping power. Beyond that, all you need is the beautifully balanced collection of classic seasonings pictured above — which you probably have in your spice collection already.
- Safflower oil is my high-heat, neutral-tasting vegetable oil of choice. You can use that or sunflower, canola, peanut, vegetable oil blend, or any other refined oil with a neutral taste and very high smoke point.
- Nice, flavorful, soft sandwich rolls contribute just the right vibe. Think brioche or potato rolls for maximum flavor. If you really want to kick things up, you can make your own.
- You'll griddle the rolls with a little bit of good butter. Here and virtually everywhere, I start with a cultured, salted butter from grass-fed cows. This sounds fancy but doesn't have to be. Kerrygold, for example, is sold in most supermarkets at a reasonable price.
- Kewpie is a Japanese brand of mayonnaise that’s creamier, tangier, and higher in umami than American mayo. It’s made with egg yolks instead of whole eggs and has a slightly thinner consistency. It's worth seeking out, but you can use a regular good-quality supermarket mayo if you want.
- Shredded romaine adds a little bit of lightness and crunch without overwhelming the sandwich. You'll simply slice a few leaves crosswise into thin ribbons to produce the perfect shreds.
- Your favorite brand of dill pickle slices heighten the whole experience just enough. You can even make your own if you like.
- Like most fried foods, this recipe is at its best shortly after emerging from the kitchen. I don't recommend going out of your way to make it in advance. That said, if you really need to fry the chicken ahead of time, you can do so up to a couple of hours in advance, then reheat and re-crisp in a 350°F oven. Assemble sandwiches shortly before serving.
- Leftover fried chicken will keep in an airtight container in the fridge for a week. Reheat and re-crisp in the oven or toaster oven.
Suggested variations
If you'd like to amp things up, this crispy chicken sandwich recipe makes a fabulous starting point for all sorts of variations. Here are a few favorites:- Buffalo: Dredge the fried chicken through a mixture of ¼ cup Frank's Red Hot and two tablespoons melted butter, and add some crumbled blue cheese.
- Pimento cheese: Swap out the mayo for a generous schmear of pimento cheese on each bun half. Consider adding a juicy tomato slice and some crisp-cooked bacon.
- Hot honey: Drizzle on plenty of your favorite hot honey, and consider swapping out the lettuce for slaw.
- Kimchi: Swap in your favorite kimchi for the lettuce and pickles, and add a slice or two of American cheese (I know — but it works).
- Reuben: Swap in Thousand Island dressing for the mayo, add some melty Swiss cheese, and swap in slaw for the lettuce if you like.
Nutrition
Hungry for more?
Subscribe to Umami Girl's email updates, and follow along on Instagram.




Anonymous says
Anonymous says
Anonymous says