This post may contain affiliate links. Learn more.
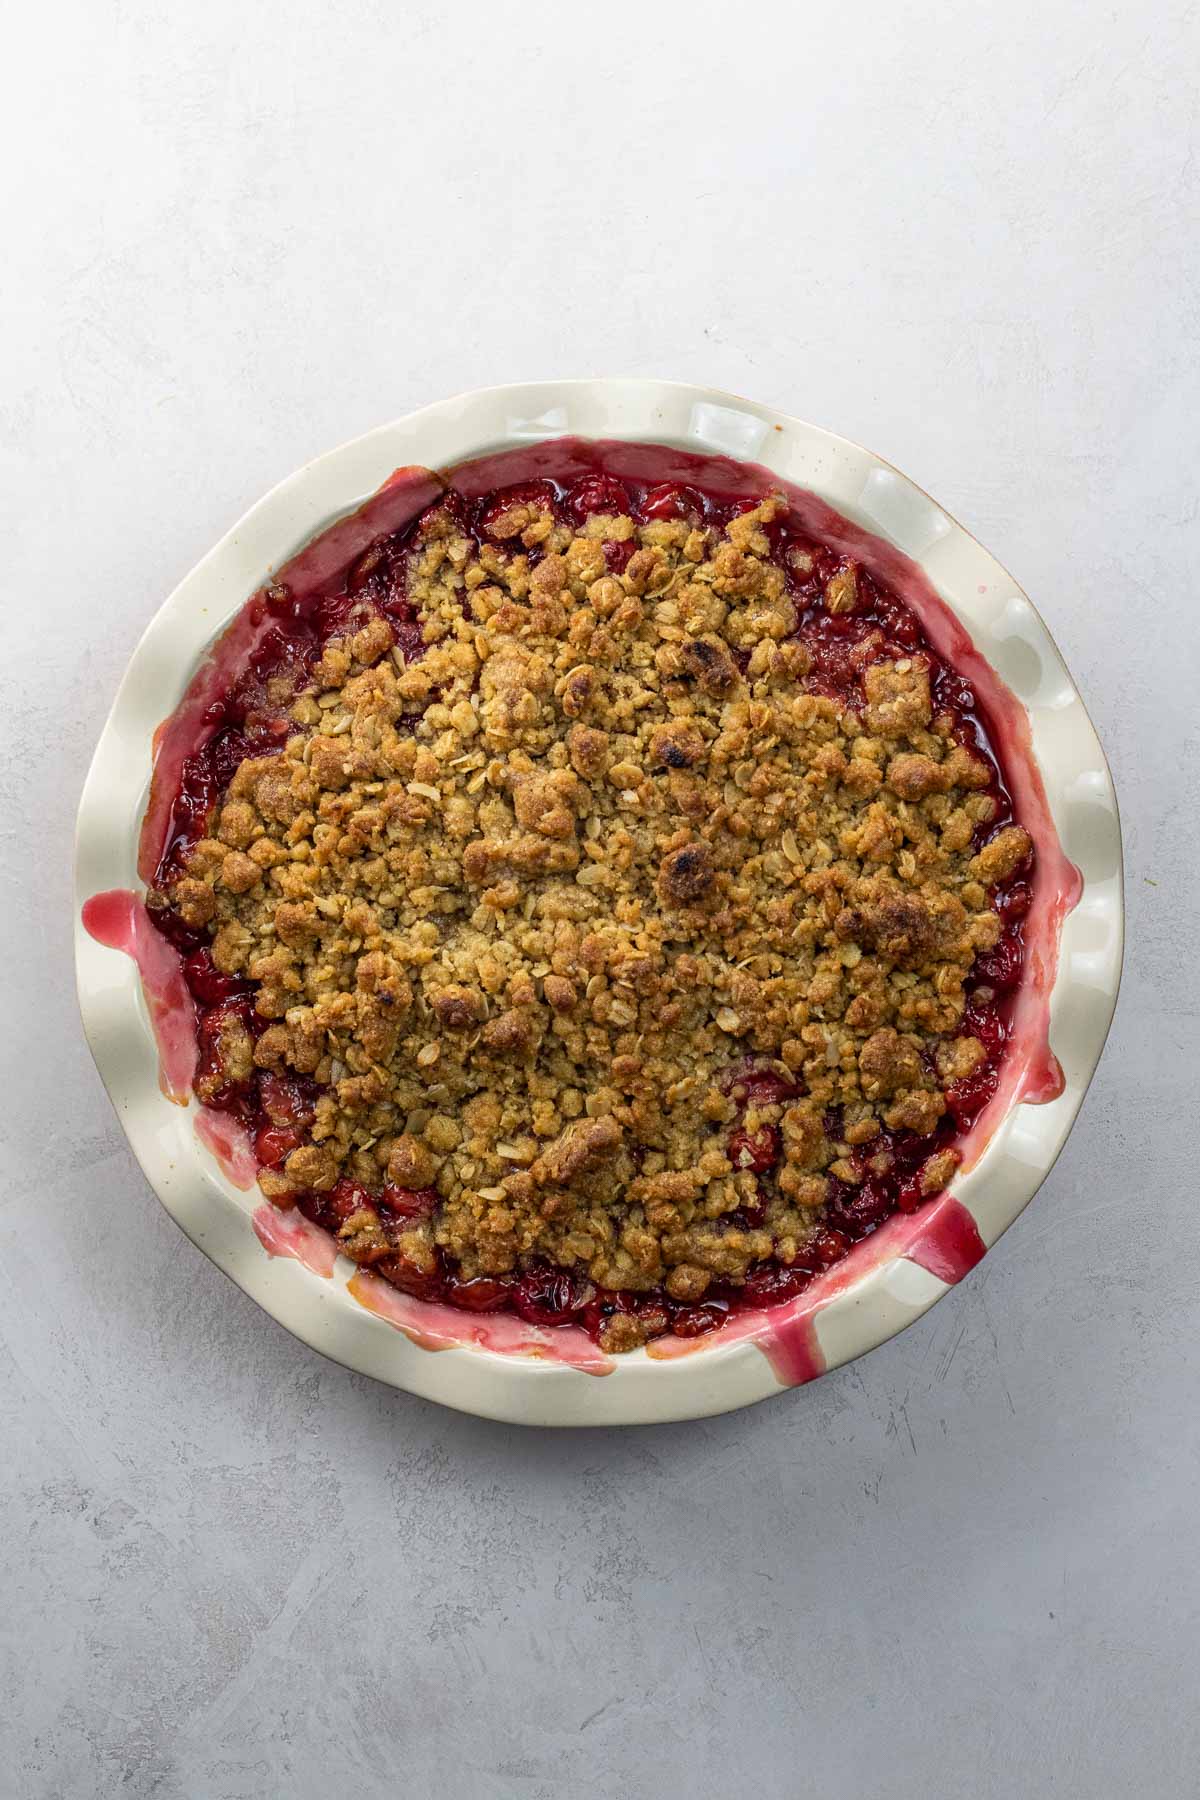
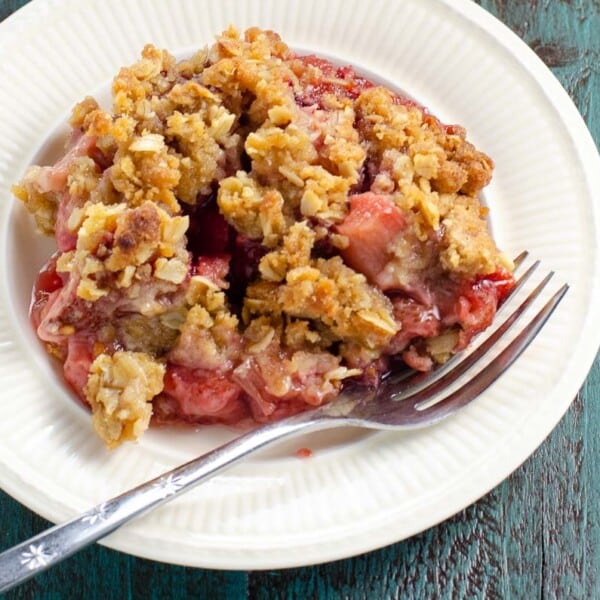
Sour cherry crisp is an easy and beautiful way to let this fleeting seasonal ingredient shine, without overwhelming it. Make-ahead friendly.
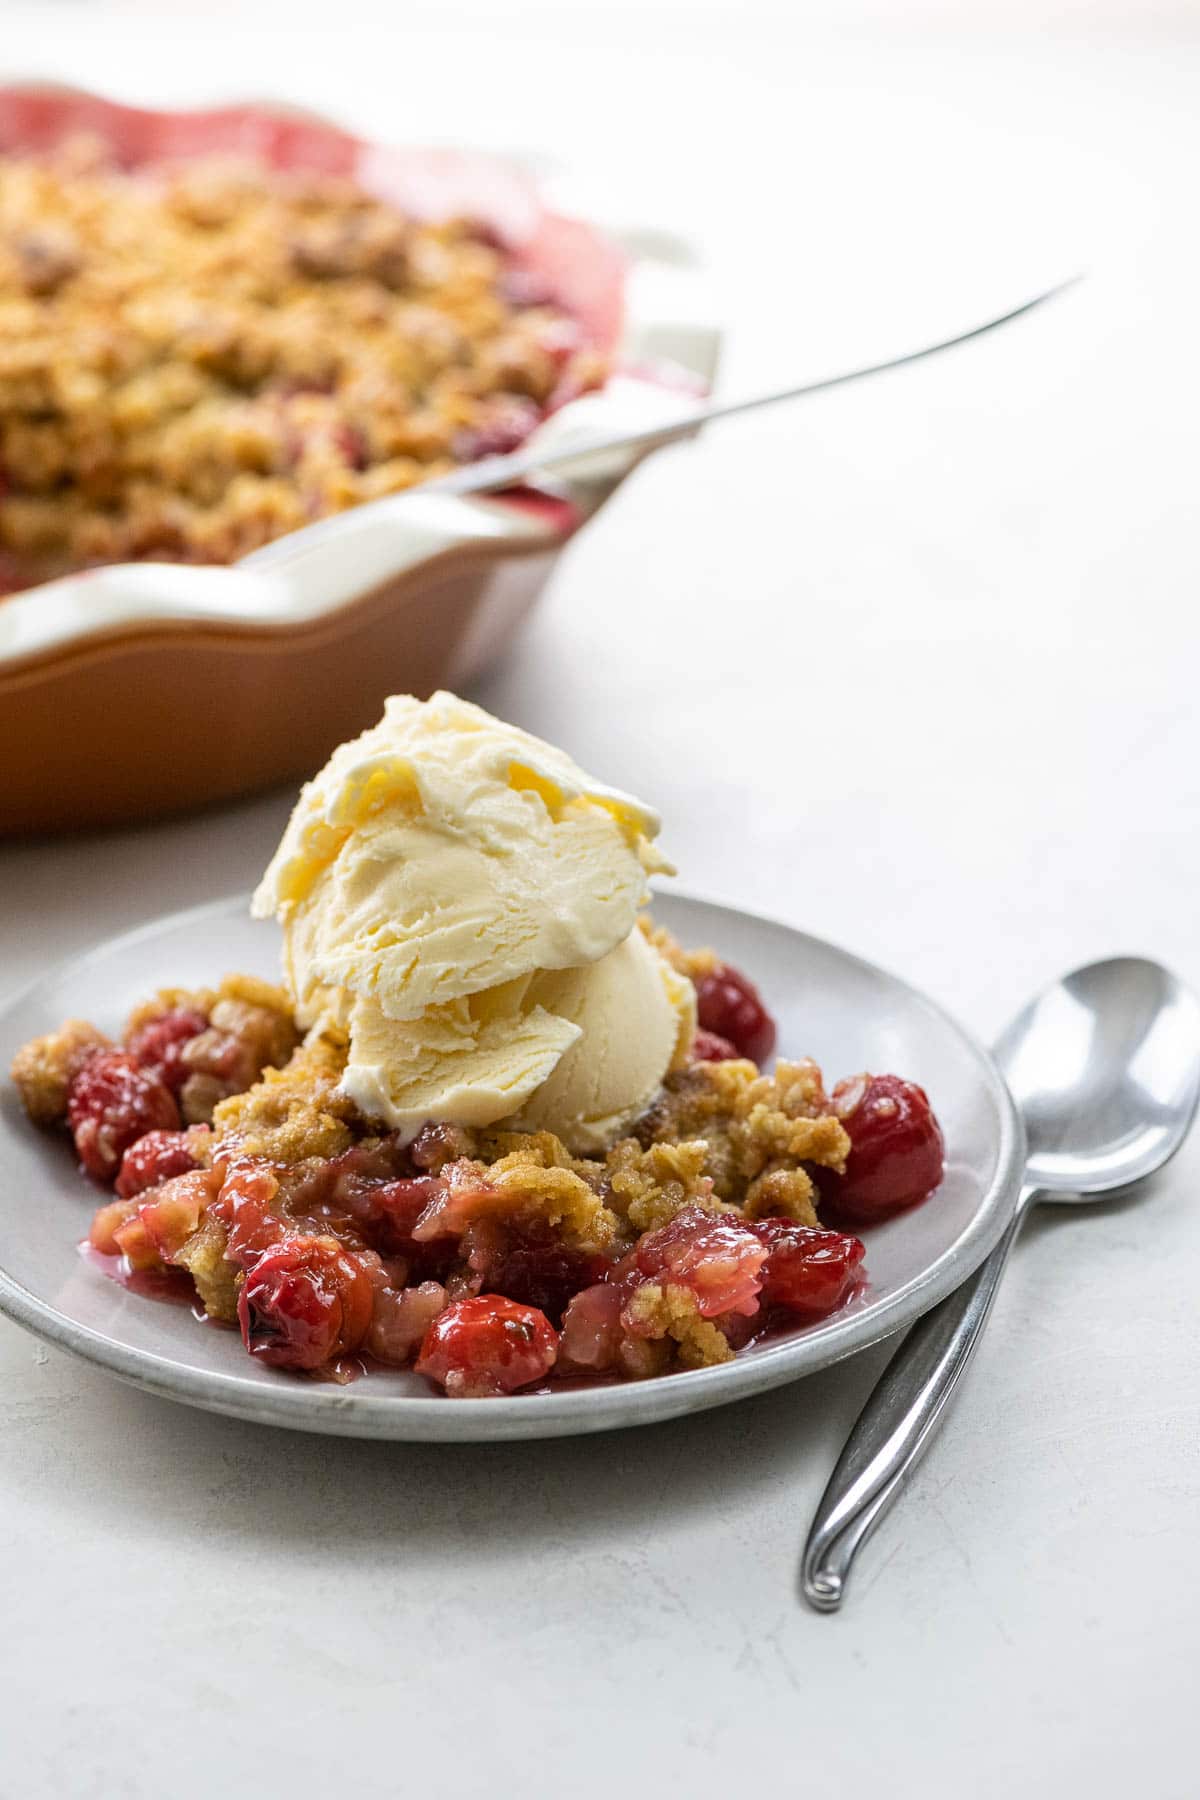
Why we love this recipe
There’s nothing better than a big, bubbly plate of sour cherry crisp to share with friends. This recipe:
- Makes the most of fleeting seasonal produce, enhancing and gently sweetening sour cherries’ natural goodness without overwhelming it
- Is one of the breeziest desserts around, perfect for a low-key introduction to summer
- Can be made with frozen sour cherries, which is great since the season lasts mere days
The only hard part is pitting the cherries. In general I’m not a fan of single-purpose kitchen tools, but a cherry pitter is an exception. It makes things SO much easier (and you can use it for olives, too).
What you’ll need
Here’s a glance at the ingredients you’ll need to make this recipe. First, you’ll make the simple filling.
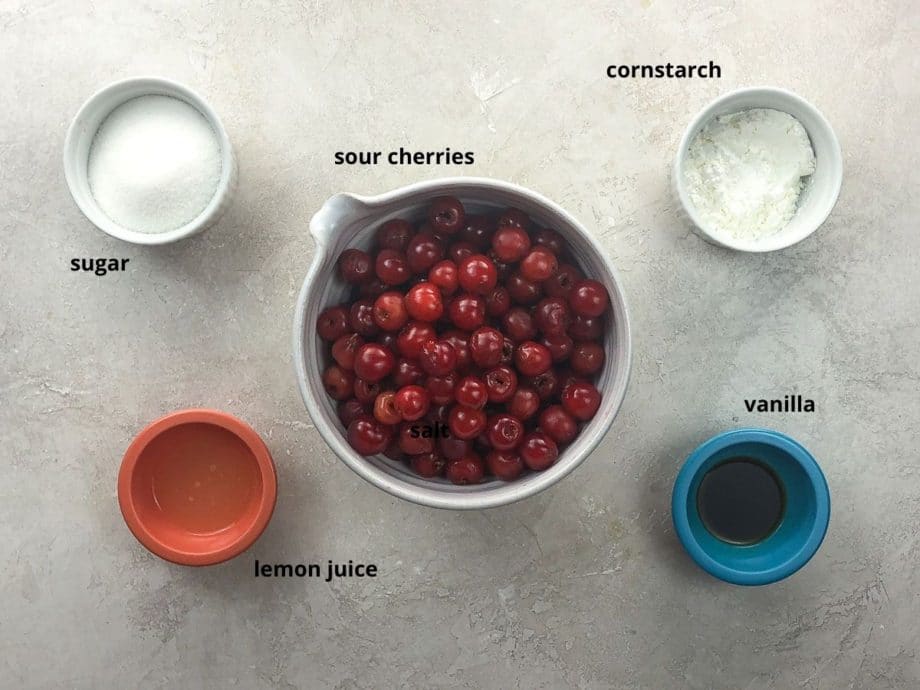
- Sour cherries, also called tart cherries, are delicate, thin-skinned, and bright red. As the name suggests, they’re very sour, and they have a floral briskness that really shines when lightly sweetened. Please refer to the FAQ section below for more information.
- A little bit of vanilla amplifies the cherries’ flavor, and a splash of lemon juice adds a complexity to their brightness.
Then you’ll make the topping. This is our versatile crumble topping that we use for many a fruit crisp.
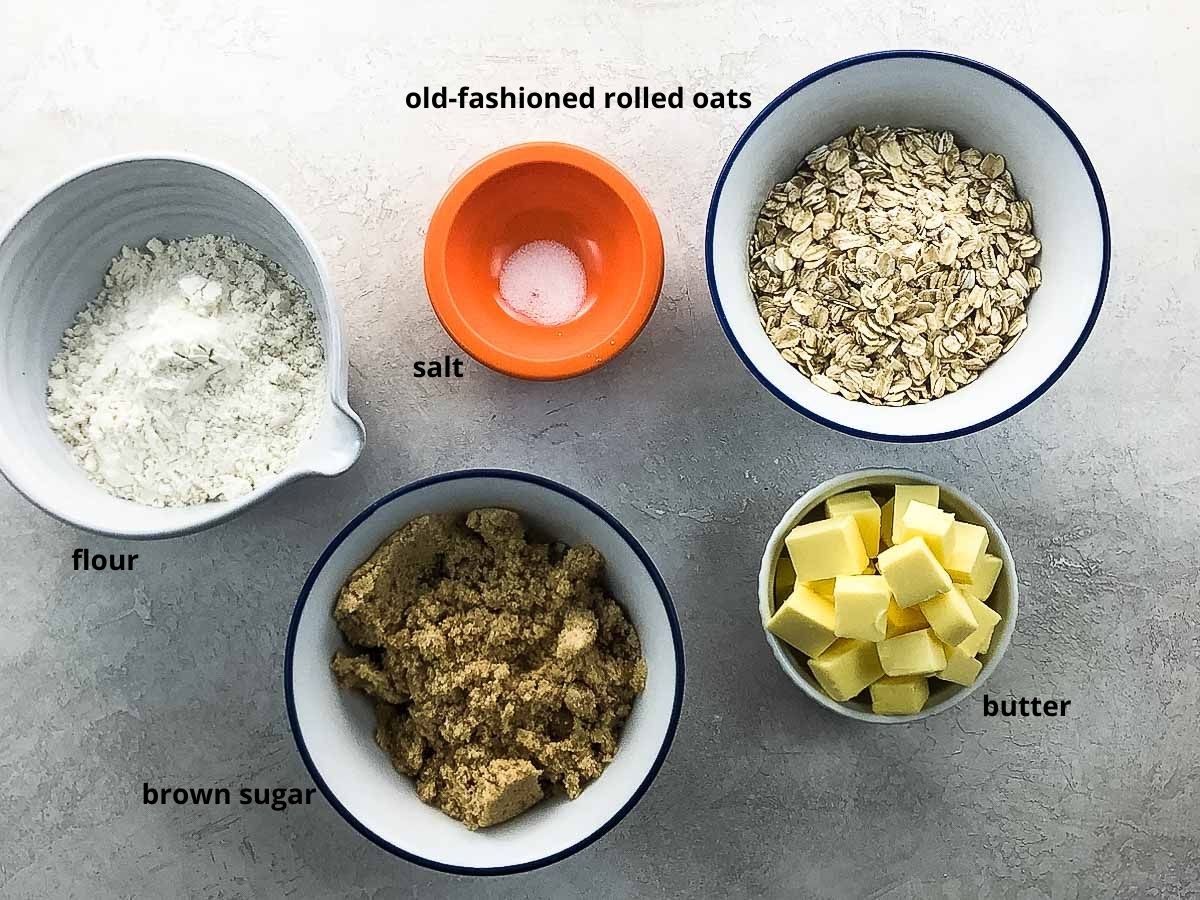
- Old-fashioned rolled oats give a bit of heft and chew to the topping. I prefer these, but you can use quick rolled oats if that’s what you’ve got.
- Good old light brown sugar adds a caramel sweetness. You can experiment with other brown sugars if you like.
- All-purpose flour is my go-to. To make this recipe gluten-free, you can substitute a 1:1 GF flour blend (and make sure the oats are also certified GF).
How to make it
Here’s what you’ll do to make a beautiful sour cherry crisp. You can see the steps in action in the video that accompanies this post, and get all the details in the recipe card below.
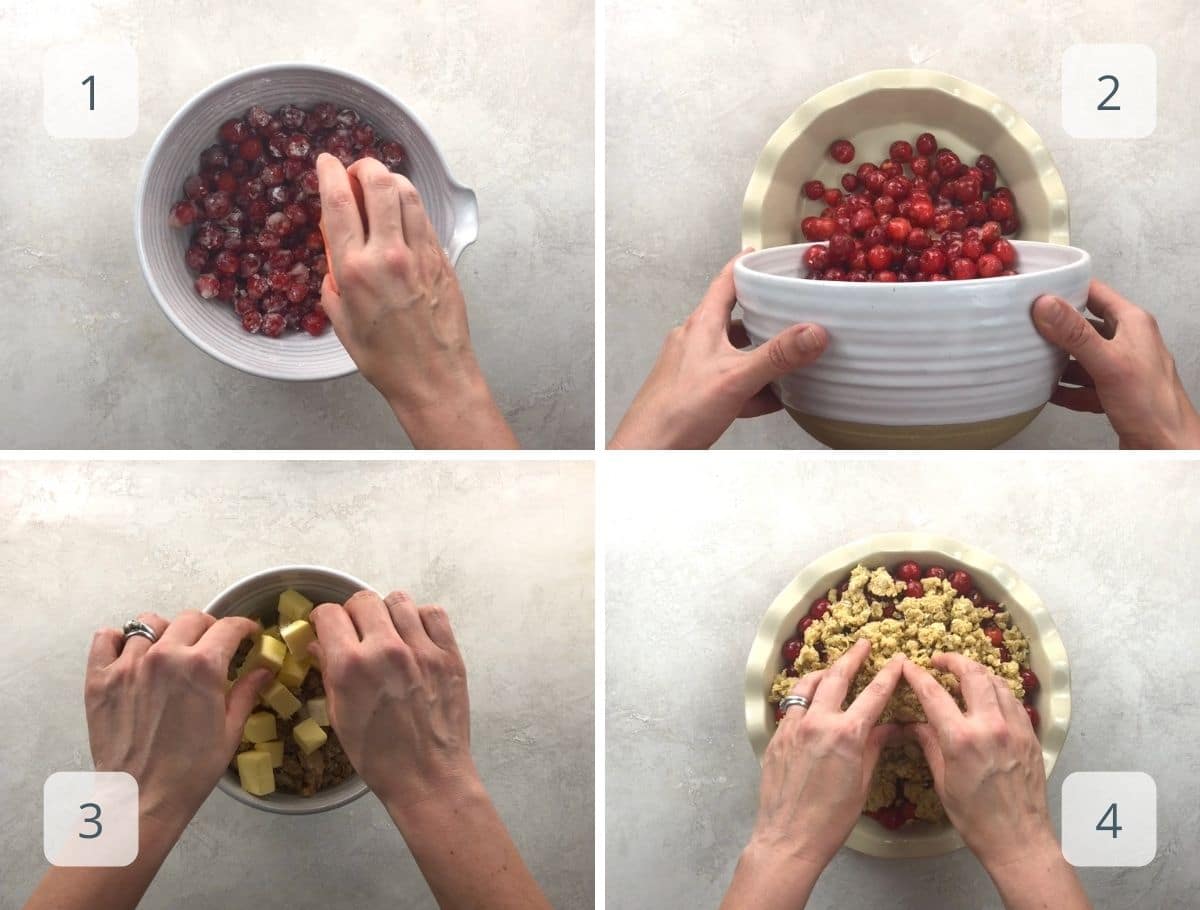
- Place the pitted cherries, sugar, and cornstarch into a mixing bowl and gently stir to coat. Mix in the vanilla and lemon juice.
- Pour filling into a deep-dish pie plate and set it over a rimmed baking sheet to catch drips.
- To make the topping, stir together the dry ingredients and then pinch in the butter with your fingers until it comes together into a crumbly topping with no loose bits of flour or oats.
- Sprinkle the topping evenly over the filling. Bake in the middle of a 375°F oven for about 40 minutes, until bubbling vigorously and lightly browned. Serve warm or at room temperature, with ice cream if you like.
Expert tips and FAQs
There are several varieties that fall into the sour category, including Montmorency and Morello. You can use them interchangeably in this recipe.
We get them once a year by picking as many as we can at Battleview Orchards and freezing them for use throughout the year. You can also buy morello cherries in syrup in a jar. I’ve never used the jarred ones, but I’d recommend draining them and substantially reducing the amount of sugar in the filling. I’d probably try two tablespoons, but you might want to use up to 1/4 cup.
Yes. Frozen fruit gives off a lot of liquid, so you’ll need to defrost them first and drain off all the liquid before proceeding with the recipe. You can either discard the liquid or put it into a very small pot and simmer it until reduced to a few tablespoons, then add it to the filling.
Yes, you can make it the night before or early in the day and leave to cool at room temperature.
If you have leftovers, you can cover the pie plate and leave it at room temperature for 24 hours. After that, store it in the fridge for up to a week. If you want to recrisp the topping before serving, pop it into the toaster oven for a few minutes.
More favorite sour cherry recipes
- Cake
- Syrup
- Shirley Temples
- French 75
- Muffins
- Frozen yogurt
- Domenica Marchetti’s recipe for sour cherry pie (via NPR)
Summarize & Save This Content On
Sour Cherry Crisp
Ingredients
For the filling
- 2 pounds (908 grams) pitted sour cherries
- ½ cup (100 grams) sugar
- 2 tablespoons (21 grams) cornstarch
- 2 teaspoons (10 ml) vanilla extract
- 1 tablespoon (15 ml) freshly squeezed lemon juice
For the topping
- ¾ cup (60 grams) rolled oats
- ¾ cup (90 grams) all-purpose flour
- ⅔ cup (142 grams) light muscovado sugar or light brown sugar
- Pinch of salt
- 8 tablespoons (112 grams) butter, diced
Instructions
- Preheat the oven to 375°F with a rack in the center.
- In a large bowl, gently mix together the sour cherries, sugar, cornstarch, vanilla extract, and lemon juice until well combined.
- Set a deep-dish pie plate on a heavy, rimmed baking sheet and pour in the filling.
- In a medium bowl, combine the oats, flour, brown sugar, and salt. Stir together thoroughly. Add the diced butter and, using your fingers, pinch the ingredients together until they form a cohesive, crumbly topping and no lumps of butter or loose bits of flour or sugar are left.
- Crumble the topping evenly over the filling.
- Place the pie plate on a rimmed baking sheet to catch any drips. Bake for about 40 minutes, until bubbling vigorously and lightly browned. Baking time may be affected by the shape of your dish and other factors, so please use these visual cues to test for doneness. If the topping browns before the filling is bubbling enough, you can cover it lightly with foil for the remainder of baking.
- Serve alone or topped with vanilla ice cream.
Notes
- To make this recipe gluten-free, use certified gluten-free oats and a gluten-free flour blend such as this one.
- Protip: Fruit crisps make an acceptable breakfast once in a while. 🙂 Serve with alone or topped with vanilla ice cream for dessert, or with Greek yogurt as an excuse to eat dessert for breakfast or brunch.
- Sour cherry crisp is equally great warm or at room temperature.
- Storing and reheating leftovers: Cover and leave at room temperature for 24 hours. After that, store it in the fridge for up to a week. If you want to recrisp the topping before serving, pop it into the toaster oven for a few minutes.
- If you like, you can prepare the crisp in advance, wrap well in plastic wrap and foil, and freeze the whole thing for up to a year. You can bake straight from frozen, adding some extra time and covering to prevent over-browning.
- You can start with frozen sour cherries if that's what you've got. Frozen fruit gives off a lot of liquid, so you'll need to defrost them first and drain off all the liquid before proceeding with the recipe. You can either discard the liquid or put it into a very small pot and simmer it until reduced to a few tablespoons, then add it to the filling.
Nutrition
Nutrition information is automatically calculated, so should only be used as an approximation.





You are the only one who has wrote instructions for making a cherry crisp so that I fully understand the whole program…even if frozen and what needs to be done.
I made one tonight by the seat of my pants, while trying to figure out what to do if frozen cherries.
I improvised and it turned out great. Wish I had seen your’s first!!!!
Thanks, Diane!
In the oven now, back in about 40 minutes. I could not get the crumble topping to the point where, no lumps of butter or loose bits of flour or sugar are left. Stay tuned.
Question: how do I keep brown sugar from forming rocky lumps that don’t break up.
Hi Phil, it sounds like your brown sugar may have been stored improperly (either at the store or in your pantry) or have been too old. It should be full of moisture or else, as you experienced, it will be hard to incorporate into any recipe. Keeping it in a truly airtight container and using it within a few months will help a lot. You can rescue hardened brown sugar in a couple hours (pretty effectively in my experience) by introducing a controlled source of moisture. Start with the brown sugar in an airtight container and add a slice of plain, fresh bread. The sugar will absorb enough of the moisture from the bread to become more workable. I’ve found the bread method keeps the sugar soft long enough to work with but not for an extended period. If you don’t mind buying something, you can use a small terra cotta disc, soaked in water and then wiped dry, instead of the bread.
Thank you Carolyn. The recipe was very good, I used 2 cans of Tart Cherries from Oregon. I don’t think two cans was enough – I had more crisp than cherries. Will try again.
I made this recipe with sour cherries from my tree that I’d frozen. I was concerned that it would be too soupy because frozen cherries tend to have more juice, but the 2T of cornstarch made a perfect consistency. I made it in a 7×11 inch glass pan that was filled half way up when I put it in the oven. While baking, it bubbled up to the top but never overflowed. Yeah!! I found the flavor just a bit too sweet, and the topping a bit too doughy. Next time I will reduce or leave out the vanilla (I find it mutes the cherry flavor), add less sugar (both in the cherries and in the topping), and more oats to the topping. I wonder if the lemon juice is needed as I added Fruit Fresh to the cherries before freezing them so they wouldn’t turn brown. Overall, this is the best cherry crisp recipe I’ve found – everyone loved it.
Thanks, Louise!
I have pitted sour cherries in syrup in a jar. Can I use these to make this sour cherry crisp recipe? I assume I should drain the cherries well, then see how many ounces I have, then adjust the recipe to use this many cherries. How much sugar should I use per 16 ounces of cherries – in the filling, and also in the topping? I assume I should reduce the sugar since these cherries were in syrup, so there will already be lots of sugar in the filling, although not in the topping.
Hi there, I’ve never used sour cherries in syrup, so I’m not sure how sweet they are and wouldn’t want to guide you incorrectly. Someone had asked this question in an earlier comment, so you could try the suggestions I gave there, or perhaps start with a recipe that calls for jarred sour cherries. Good luck!
Can I freeze this before it’s baked?
Hi Suzanne, yes, that would be fine! You can bake it straight from the freezer, just adding a bit of time while it’s covered.
Made this twice, first time I doubled the recipe for the topping because I find that most cases it doesn’t make enough. This time I was wrong, way too much topping and not enough cherries, but the taste was excellent. So today, I made it again and stuck to the recipe as written. Something went wrong though, there was way too liquid. I baked it for the full 40 minutes and it looked good, but after it cooled enough and I went to serve it, there was a ton of liquid in the bottom of the pie dish. The taste is still great, and the topping was perfect, just a lot of excess liquid. I used fresh cherries, same as before, not sure what happened, maybe too many cherries this time? I will try again because it really did taste good.
Hi Lori, if you waited until it cooled off for a while, I’m not sure why there was too much liquid. It could just be the particular type of sour cherries. I wouldn’t recommend reducing the cherries — you could add a little more cornstarch to the filling mixture to help it thicken up a bit more.
So glad, Tina! And how amazing to have your own tart cherry tree. xx
Overall a great recipe. I used frozen cherries since I can’t get fresh tart cherries where I live and I did find that the crust was much soggier than it is in other crisps I’ve made. I think it would have turned out better if I had let the frozen cherries thaw before cooking. Leaving them frozen leaves large gaps for the topping to fall into and soften. Still delicious, and an incredibly easy recipe.
Thanks, Dan. I’m going to add a note about this in the post. Frozen fruit gives off a ton of liquid, so I recommend defrosting and draining the liquid. You can either discard it or cook it down and include it (as I note in some other recipes but not this one, whoops). Glad you enjoyed it.
I’ve made this recipe twice with fresh tart cherries from my tree. Family loved it with vanilla ice cream and whipped cream..
I have a jar of sour cherries in syrup. Should Less sugar be added or should I rinse the cherries? This recipe sounds more healthy than some.
Hi Bea, I have to admit that I’ve never used jarred sour cherries in syrup. That said, I’d recommend draining them and substantially reducing the amount of sugar in the filling. I’d probably try two tablespoons, but you might want to use up to 1/4 cup. If you make it, please let us know how it goes, since I’m sure others will have the same question. Thank you!